20. Reassurance
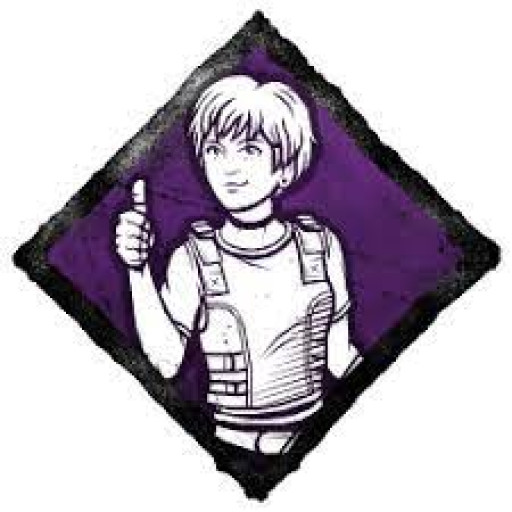
Perk details: When within 6 metres of a hooked Survivor, press the Active Ability button to halt their Sacrifice Process for the next 20/25/30 seconds. If the hooked Survivor has already entered the Struggle Phase, its Skill Checks are paused for that duration.
The perk Reassurance is a very good cooperative perk which allows you to stop your teammate's timer whilst they are on the hook, and it is a perk widely used, especially where more killers are camping on the hook.
Personally, it is a perk that is very recommended for all the survivors, especially for new beginners who are on the last hook stage, which might be difficult to succeed in the skill checks, and therefore usually, the survivor would die faster, but with this perk, everything would change.
In Conclusion, this is a very good perk to use. However, it is not a perk that is effective in every game situation, such as when the killer 'is not camping, therefore making this perk pretty much useless unless it comes to saving the survivor at the last minute.
Why Reassurance Is Great:
- It allows you to stop the survivors' timer for the duration of a maximum of 30 seconds whilst they are on the hook, slowing down the progress of the game.
- A good perk to avoiding killer camping is allowing you more time to rescue the hooked survivor.
- It can allow you to save more time and do generators as a team if the killer is camping or very close to the hook, allowing you to use game tactics to rescue survivors at the last minute with more progress.
Best Builds to use with the Reassurance perk:
1. Reassurance - Halt their Sacrifice Process for the next 20/25/30 seconds.
2. Deliverance - Your Self-Unhook attempts will succeed 100 % of the time and activates after unhooking someone.
3. Flashbang - After repairing Generators for 70/60/50 %, Flashbang activates: Enter a Locker empty-handed and press the Ability button to craft a Flash Grenade.
4. Kinship - While you are on the Hook in the Struggle Phase, Kinship activates: If another Survivor is within 16 metres of your Hook while Kinship is active, the Struggle Phase timer is paused for 26/30/34 seconds.
Build Reference: Cocojobro Dead By Daylight Gameplay
19. Boon: Shadow Step

Perk details: Soft chimes ring out within a radius of 24 metres. Survivors inside the Boon Totem's range benefit from the following effects: Scratch Marks are suppressed. Auras are hidden from The Killer. Both effects linger for 2/3/4 seconds after leaving the Boon Totem's range.
The perk Boon: Shadow Step is an amazing contribution perk, which allows its effects to be used on all the survivors within the game. With Boon, you can use the perk on any dull totem on the map, for which then you can use up to 5 totems which can be very effective and powerful when going towards losing the killer, as scratch marks would be completely suppressed and hidden making it nearly impossible for the killer to find the survivors unless the killer focuses on destroying the boon totems.
In Conclusion, it is an amazing perk; however, its disadvantages come in towards the perk being useless if other survivors are doing the dull totems, decreasing the amount on the map, so the perk is good if other survivors know about the perk.
Why Boon: Shadow Step Is Great:
- It allows hiding any trace of escape from the killer, allowing you to escape safely & losing the killer with ease.
- A perk that can affect every survivor within the range of the boon totem, which is 24 metres, making it a great cooperation perk.
- The perk can be used anytime & anywhere where there is an available dull totem, allowing you to use this perk up to 5 totems across the map.
Best Builds to use with the Boon: Shadow Step perk:
1. Boon: Shadow Step - While the boon totem is active: Scratch Marks are suppressed. Auras are hidden from The Killer. Both effects linger for 2/3/4 seconds after leaving the Boon Totem's range.
2. Dead Hard - Press the Active Ability button while running injured to trigger the Endurance Status Effect for 0.5 seconds.
3. Bite the Bullet - Failed Healing Skill Checks do not trigger a Loud Noise Notification and only apply a Regression penalty of 3/2/1 %.
4. Boon: Circle of Healing - While the boon totem is active: It increases all Healing speeds by 40/45/50 %. Unlocks the Self-Care ability, allowing you to self-heal without needing a Med-Kit at 50 % of the normal Healing speed.
Build Reference: SpookyLoopz Dead By Daylight Gameplay
18. Balanced Landing
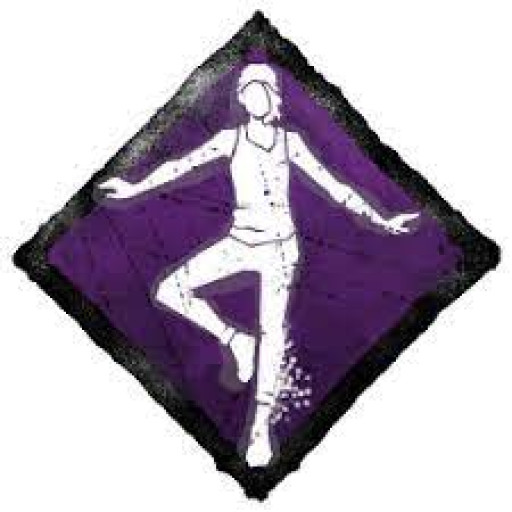
Perk details: When falling from great heights, you benefit from the following effects: reduces the Stagger duration by 75 %. Suppresses Grunts of Exertion from falling. Upon landing, break into a sprint at 150 % of your normal Running Movement speed for 3 seconds. Balanced Landing causes the Exhausted Status Effect for 60/50/40 seconds. Balanced Landing cannot be used when Exhausted.
Balanced Landing is a great exhaustion perk that can be used in many situations in the game, mainly whilst falling from high elevations such as housing, hills or even the staircase which goes towards the basement.
Personally, it is a perk that has many advantages, such as using the perk that has the potential to confuse the killer and therefore allows you to go for a clear escape.
In Conclusion, it is a very good exhaustion perk; however, the disadvantages are that this perk works mostly on good maps that have elevations and can be pretty useless, such as on the laboratory map, where there is only one high elevation in the middle of the map, where no survivor goes there as it is a very bad spot to be in as the killer can easily catch up on the survivor.
Why Balanced Landing Is Great:
- It allows you to escape from the killer effectively, faster than any other exhaustion perks, jumping from a high elevation.
- It is a perk that can be unpredictable for the killer and can be used from small elevations, such as jumping from a staircase in the basement, allowing you to unhook the survivor much faster.
- It is one of the easiest exhaustion perks to pull off, as it only takes to find a high elevation and just jump from it.
Best Builds to use with the Balanced Landing perk:
1. Balanced Landing - When falling from great heights, you benefit from the following effects: Reduces the Stagger duration by 75 %. Suppresses Grunts of Exertion from falling. Upon landing, break into a sprint at 150 % of your normal Running Movement speed for 3 seconds.
2. Vigil - Increases your Recovery rate from Blindness, Broken, Exhaustion, Exposed, Haemorrhage, Hindered, and Oblivious Status Effects by 20/25/30 %. This effect also applies to all other Survivors within 8 metres of your location and lingers for 15 seconds. Increases your Recovery rate from Blindness, Broken, Exhaustion, Exposed, Haemorrhage, Hindered, and Oblivious Status Effects by 20/25/30 %. This effect also applies to all other Survivors within 8 metres of your location and lingers for 15 seconds.
3. Self-aware - You walk 10/15/20 % faster and can see your Scratch Marks.
4. Adrenaline - Once the Exit Gates are powered, instantly heal one Health State and sprint at 150 % of your normal Running Movement speed for 5 seconds. Adrenaline is on hold if you are disabled at the moment it triggers and will instead activate upon being freed. If playing against The Nightmare, Adrenaline will wake you from the Dream World upon activation. Adrenaline ignores an existing Exhaustion timer but causes the Exhausted Status Effect for 60/50/40 seconds.
Build Reference: Naymeti Dead By Daylight Gameplay
17. Quick & Quiet
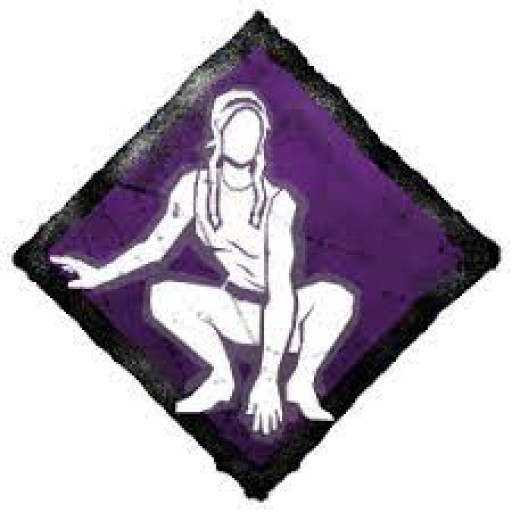
Perk details: Suppresses the Loud Noise Notification and the sound effects triggered by rushing to vault Windows, Pallets, or entering or exiting Lockers. Quick & Quiet has a cool-down of 30/25/20 seconds.
The perk Quick & Quiet is an amazing perk and works best with combinations of other perks, which can make it a pretty powerful combination gameplay, with only a 20-second cool-down, making it very useful without any survivor factors that will cause the cool-down to slow down in any way.
Personally, it is a perk I would use when confusing the killer and using it to escape dire situations or even gain more blood points. It means stunning the killer more often when it comes to gaining blood points and gaining more time for the survivors. and therefore, it has a very good combination of quick & quiet and head-on, which allows you to go into a locker unnoticed and stun the killer the moment he passes by.
In Conclusion, it is a great perk to use, especially when near the killer, allowing you to do many actions that will have this perk as an advantage, and most importantly, this perk doesn't have any disadvantages, and with a fast cool-down, it makes it a pretty powerful perk.
Why Quick & Quiet Is Great:
- Quick & Quiet allows you to do any sort of action as a survivor very quietly, making it very unaware of the killer finding you and therefore allowing you to escape.
- Allows you to use combinations such as with the perks head-on, allowing you to jump into a locker very fast whilst in a chase, therefore allowing you to stun the killer to create a flawless escape.
- Very effective when it comes to looping the killer when you can vault windows without making noise, which can, at the same time, confuse the killer and therefore allow you to escape from the area.
Best Builds to use with the Quick & Quiet perk:
1. Quick & Quiet - Suppresses the Loud Noise Notification and the sound effects triggered by rushing to vault Windows, Pallets, or rushing to enter or exit Lockers. Quick & Quiet has a cool-down of 30/25/20 seconds.
2. Iron Will - Reduces the volume of Grunts of Pain while in the Injured State by 25/50/75 %.
3. Balanced Landing - When falling from great heights, you benefit from the following effects: Reduces the Stagger duration by 75 %. Suppresses Grunts of Exertion from falling. Upon landing, break into a sprint at 150 % of your normal Running Movement speed for 3 seconds.
4. Calm Spirit - Prevents Crows from being alerted by your proximity and flying off unless they are being stepped on. Suppresses the urge to scream from pain at all times. Suppresses all noises related to unlocking Chests and cleansing or blessing Totems. Reduces their Interaction speed by 40/35/30 %.
Build Reference: PROBZZ Dead By Daylight Gameplay
16. Wiretap

Perk details: After repairing Generators for a total of 33 %, Wiretap activates: After repairing a Generator for 3 seconds, press the Active Ability button to install a Wiretap, which stays active for 60/70/80 seconds. The Auras of trapped Generators are revealed to all Survivors in yellow. When the Killer comes within 14 metres of a trapped Generator, their Aura is revealed to all Survivors. Damaging the Generator destroys the Wiretap.
The perk Wiretap is one of the newest perks that has been introduced in the game of dead by daylight by the survivor Ada Wong, which overall she has many good perks that can be used in the game; however, wiretap is one of her best perks which I would recommend.
Personally, it is a perk that is a very contribution to all the survivors in the game, as it allows all the survivors to see the generator that is being progressed, and therefore additionally allows you to see the killer who is within a 14-metre radius of the generator, creating a great awareness, and making it feel pressured for the rest of the survivors.
In Conclusion, it is a perk that I would recommend using for every survivor, especially with combinations such as the perk 'blast mine', which allows you to trap the generator with a mine that will cause blindness, stunning the killer and anyone nearby, making it a very combination.
Why Wiretap Is Great:
- A very good cooperative perk allows you to highlight the generator that has been repaired in progress for all the survivors in the game, making them very aware of the generator they should repair.
- The effects of the perk allow all the survivors to see the aura of the killer, who is 14 metres within the trapped generator, allowing them to see the direction the killer is coming towards.
- Allows all the survivors to see whether the killer is baiting the generator by seeing their aura and whether the killer is waiting for the survivor to come to repair the generator, which might also be the case
Best Builds to use with the Wiretap perk:
1. Wiretap - After repairing Generators for a total of 33 %, Wiretap activates: After repairing a Generator for 3 seconds, press the Active Ability button to install a Wiretap, which stays active for 60/70/80 seconds. The Auras of trapped Generators are revealed to all Survivors in yellow. When the Killer comes within 14 metres of a trapped Generator, their Aura is revealed to all Survivors. Damaging the Generator destroys the Wiretap.
2. Alert - Whenever the Killer destroys a Pallet or a Breakable Wall or damages a Generator, their Aura is revealed to you for 3/4/5 seconds.
3. Lithe - After performing a rushed vault, break into a sprint of 150 % of your normal Running Movement speed for a maximum of 3 seconds. Lithe causes the Exhausted Status Effect for 60/50/40 seconds.
4. Blast Mine - After repairing Generators for a total of 66 %, Blast Mine activates: After repairing a Generator for at least 3 seconds, press the Ability button to install a Trap, which stays active for 35/40/45 seconds. The Aura of Trapped Generators is revealed in yellow to all Survivors. When the Killer damages a Trapped Generator, the Trap explodes, stunning them and blinding anyone nearby.
Build Reference: KaitMet Dead By Daylight Gameplay
15. Deliverance

Perk details: After performing a Safe Hook Rescue on another Survivor, Deliverance activates: Your Self-Unhook attempts will succeed 100 % of the time. Deliverance causes the Broken Status Effect for 100/80/60 seconds after unhooking yourself.
The perk Deliverance is a very useful perk to use in critical situations. It can be used when progress is critically important in the game, allowing you to unhook yourself at the last second before reaching the second stage.
Personally, there can be many game tactics that can be used with this perk and are considered universal as you can use it when you are either on your own, and nobody is coming to save you, or when you are in a team, allowing to unhook yourself at the last minute so that the progress can be transferred to the generators.
Why Deliverance Is Great:
- Deliverance allows you to unhook completely by yourself, which is very useful if the survivors are very far away and they will not be able to reach you.
- You can use game tactics and unhook yourself at the very end, allowing the survivors to focus on their objectives, such as repairing the generators or going on a chase with the killer.
- It can be very useful during the end-game situation, where there is only one survivor left, and he is on the hook, allowing you to go for an escape to the exit whilst the killer is not camping you.
Best Builds to use with the Deliverance perk:
1. Deliverance - After performing a Safe Hook Rescue on another Survivor, Deliverance activates: Your Self-Unhook attempts will succeed 100 % of the time. Deliverance causes the Broken Status Effect for 100/80/60 seconds after unhooking yourself.
2. Breakdown - Each time you are unhooked or unhooked, the Hook breaks and the Killer's Aura is revealed to you for 4/5/6 seconds. A Hook broken by a Breakdown takes 180 seconds to respawn.
3. Sprint Burst - When starting to run, break into a sprint at 150 % of your normal Running Movement speed for 3 seconds. Sprint Burst causes the Exhausted Status Effect for 60/50/40 seconds. Sprint Burst cannot be used when Exhausted.
4. Decisive Strike - After being unhooked or unhooking yourself, Decisive Strike activates for the next 40/50/60 seconds: When being grabbed or picked up by the Killer, succeed a Skill Check to escape their grasp, stunning them for 3 seconds automatically. Successfully stunning the Killer will disable Decisive Strike for the remainder of the Trial and result in you becoming the Obsession.
Build Reference: MissMewnetic Dead By Daylight Gameplay
14. We'll Make It

Perk details: Increases your Altruistic Healing speed by 100 % for the next 30/60/90 seconds whenever you rescue another Survivor from a Hook.
The perk we'll make it is a perk that boosts healing massively and is very popularly used straight after unhooking someone from the hook, which is advantageous when it comes to anti-tunnelling from the killer, and spending less time on healing, which then all the time can be transferred onto repairing generators and chasing with the killer, rather than healing yourself or with others for a longer time.
Personally, it is an amazing perk that is very underrated in this game, as not a lot of people are using I would personally recommend it, especially when it is active for 90 seconds, allowing you to heal other survivors as well who might be injured much faster.
In Conclusion, it is a perk that is very powerful and can be powered up with great combinations such as botany knowledge and resilience, creating a super-heal moment.
Why We'll Make It Is Great:
- The perk allows you to heal a survivor up incredibly fast when unhooking them, allowing you to heal up a survivor before the killer has the chance to hit them again.
- You spend less time healing, therefore allowing you to use the time for repairing generators and chases with the killer.
- The perk will counter tunnelling effects, therefore, when you manage to heal a survivor before the killer comes, they will avoid being tunnelled by the killer.
Best Builds to use with the We'll Make It perk:
1. We'll make it - Increase your Altruistic Healing speed by 100 % for the next 30/60/90 seconds whenever you rescue another Survivor from a Hook.
2. Self-care - Unlocks the Self-Care ability, allowing you to self-heal without needing a Med-Kit at 25/30/35 % of the normal Healing speed.
3. Botany Knowledge - Increases your Healing speed by 30/40/50 %. Reduces the Healing efficiency of Med-Kits by -20 %.
4. Resilience - Increases your Action speeds in Repairing, Healing, Sabotaging, Unhooking, Vaulting, Cleansing, Opening, and Unlocking by 3/6/9 % when in the Injured State.
Build Reference: Ayrun Dead By Daylight Gameplay
13. Bond

Perk details: The Auras of all other Survivors within 20/28/36 metres of your location are revealed to you.
The perk Bond is a very useful perk to use in the game, as it allows you to see all the survivors within a 36-metre radius, making it very useful when focusing on either finding generators to repair with someone, which would drastically improve the progress or healing someone which can be useful so that the next turn, the survivor will not end up in a dying state, which would save up lots of time in the game, converting dying state to injured state with chasing time.
Personally, it is a perk that I would recommend especially for new survivors who are uncomfortable with surviving and playing on their own, and therefore the perk bond will allow them to progress with the help of seeing other survivors nearby.
In Conclusion, it is a perk I would say is very useful when it comes to playing solo, as it would allow you to see other survivors who are not communicating; however, when it comes to a 4-player team of friends, it is a perk that I would avoid as it would be useless as you could communicate verbally, and therefore you could substitute another great perk instead of the perk bond.
Why Bond Is Great:
- The bond perk will allow you to see every survivor within the specified radius up to a maximum of 36 metres.
- With this perk, it will allow you to find generators much faster, as you would see survivors who might be repairing generators, therefore being able to join them to repair the generator much faster.
- It a very good solo perk which can help you find information about the survivors' aura you feel more comfortable in-game and makes you feel less pressured.
Best Builds to use with the Bond perk:
1. Bond - The Auras of all other Survivors within 20/28/36 metres of your location are revealed to you.
2. Windows of Opportunity - The Auras of Breakable Walls, Pallets, and Windows are revealed to you within 24/28/32 metres.
3. Left Behind - When you are the last Survivor remaining in the Trial, the Aura of the Hatch is revealed to you when you are within 24/28/32 metres.
4. Visionary - The Auras of Generators are revealed to you within 32 metres. Each time a Generator is completed, Visionary is disabled for 20/18/16 seconds.
Build Reference: McStan Dead By Daylight Gameplay
12. Unbreakable

Perk details: Once per Trial, you can completely recover from the Dying State. Your Recovery speed is increased by 25/30/35 %.
The perk Unbreakable will allow you to completely recover from the dying state, which is very advantageous in every game situation, especially when the killer decides to 'slug' the survivors, in other words leaving the survivors on the floor and picking them up one by one, which you would then allow using this opportunity to use unbreakable either at the very last moment to find the hatch, or to rescue the survivors one by one so that you could progress within the game.
Personally, it is a perk that is incredibly useful, including when going with combinations of other perks such as 'power-struggle' or 'flip-flop', in which the recovery speed can be then used on these perks if you were not to make it completely from the floor.
In Conclusion, it is a perk that I would recommend, especially when going solo, as there are possibilities where you cannot trust your teammates. therefore relying only on yourself, making it easier to progress within the game, and therefore finding an opportunity to find the hatch if you were to be the last one on the map.
Why Unbreakable Is Great:
- The perk Unbreakable allows you to completely recover from the ground once per trial, without the need for help from other survivors.
- Recovery speed is increased substantially, allowing you to use the recovery speed with the combination of other perks such as power struggle, and flip-flop, allowing you to use their powers much faster.
- Effective when every survivor is in a dying state, allowing you to recover from the ground completely as the last survivor, enabling you to find the hatch.
Best Builds to use with the Unbreakable perk:
1. Unbreakable - Once per Trial, you can completely recover from the Dying State. Your Recovery speed is increased by 25/30/35 %.
2. Power Struggle - Reveals the Auras of available Pallets whenever you are in the Dying State. While being carried by The Killer, reaching 25/20/15 % Wiggling progression activates Power Struggle: You can drop a nearby, standing Pallet to stun the Killer and escape their grasp. Power Struggle deactivates after triggering successfully.
3. Flip-Flop - While in the Dying State, 50 % of your Recovery progression is converted into Wiggling progression, up to a maximum of 40/45/50 %, once you are picked up by the Killer.
4. Tenacity - Increases your Crawling speed by 30/40/50 %. It grants the ability to crawl and recover at the same time. Reduces the volume of Grunts of Pain while in the Dying State by -75 %.
Build Reference: Loogan Dead By Daylight Gameplay
11. Sprint Burst

Perk details: When starting to run, break into a sprint at 150 % of your normal Running Movement speed for 3 seconds. Sprint Burst causes the Exhausted Status Effect for 60/50/40 seconds. Sprint Burst cannot be used when Exhausted.
The perk Sprint Burst is considered a very powerful perk, and one of the powerful aspects of this perk is that you are able to activate it anywhere without needing to use any obstacles or actions to activate this perk, except for sprinting.
In Conclusion, it is a very good perk in dire situations. However, it is a perk that is also known as uncontrollable because once you start to run, the perk's effect takes place, which sometimes can feel like a waste unless it is timed properly, allowing you to escape the killer in situations such as when coming off the generator at the last minute; however, it is important to know that you should not come off the generator too late because the perk will take around 0.25 seconds until its effect powers up, therefore coming off too late will still allow the killer to take hit on you, which would then again be a waste.
Why Sprint Burst Is Great:
- It is a great exhaustion perk that can be used whenever you want, at any time and situation, when you are not exhausted in any way,
- Sprint burst is highly effective when running away from the killer last minute when coming off the generator, making it unexpected for the killer, and therefore allows you to either progress more or even complete the generator at the last second.
- The perk is very useful when wanting to end the chase, such as saving up the exhaustion whilst running loops, and therefore just about when you are not exhausted, you can run away from the loop without even the killer realising.
Best Builds to use with the Sprint Burst perk:
1. Sprint Burst - When starting to run, break into a sprint at 150 % of your normal Running Movement speed for 3 seconds. Sprint Burst causes the Exhausted Status Effect for 60/50/40 seconds. Sprint Burst cannot be used when Exhausted.
2. Adrenaline - Once the Exit Gates are powered, instantly heal one Health State and sprint at 150 % of your normal Running Movement speed for 5 seconds. Adrenaline is on hold if you are disabled at the moment it triggers and will instead activate upon being freed. If playing against The Nightmare, Adrenaline will wake you from the Dream World upon activation. Adrenaline ignores an existing Exhaustion timer but causes the Exhausted Status Effect for 60/50/40 seconds.
3. Vigil - Increases your Recovery rate from Blindness, Broken, Exhaustion, Exposed, Haemorrhage, Hindered, and Oblivious Status Effects by 20/25/30 %. This effect also applies to all other Survivors within 8 metres of your location and lingers for 15 seconds.
4. Off the Record - After being unhooked or unhooking yourself, Off the Record activates for the next 60/70/80 seconds: Prevents your Aura from being revealed to the Killer if they attempt to read it. Suppresses Grunts of Pain when injured. Grants the Endurance Status Effect. This effect is cancelled prematurely if you perform a Conspicuous Action.
Build Reference: Naymeti Dead By Daylight Gameplay
10. Windows of Opportunity

Perk details: The Auras of Breakable Walls, Pallets, and Windows are revealed to you within 24/28/32 metres.
The perk of Windows of Opportunity has the ability you seeing any open windows, pallets and breakable objects, which can be quite useful when being in a chase with the killer, as you would spend less time looking for something that you could use to spend more time with the killer so that the survivors can continue doing the objectives, or just by trying to avoid getting hit by the killer.
In Conclusion, it is a perk that is very useful, especially for beginner survivors, where you will be able to see any escape opportunities straight away without having to look around, but nonetheless, it can be quite useful, especially for intermediate players, where they are using this perk when getting to know a new map that has been released to the game.
Why Windows of Opportunity Is Great:
- Windows of opportunity is a great perk for seeing pallets and windows that can be incredibly useful when in a chase with the killer, spending less time finding appropriate obstacles to loop around with.
- It is a very useful perk, especially in enclosed maps such as Racoon city, which can be quite difficult for survivors who are new to the map, therefore allowing you to redirect to those objects to go on an effective, fast chase with the killer.
- Very advantageous for new survivors who are new to the game, allowing them to use the perk to learn what windows and pallets there are in the game so that they can use them later on without having to use the perk.
Best Builds to use with the Windows of Opportunity perk:
1. Windows of Opportunity - The Auras of Breakable Walls, Pallets, and Windows are revealed to you within 24/28/32 metres.
2. Overcome - Whenever you become injured, you retain the Movement Speed burst for two additional seconds. Overcome causes the Exhausted Status Effect for 60/50/40 seconds. Overcome cannot be used when Exhausted.
3. Vigil - Increases your Recovery rate from Blindness, Broken, Exhaustion, Exposed, Haemorrhage, Hindered, and Oblivious Status Effects by 20/25/30 %. This effect also applies to all other Survivors within 8 metres of your location and lingers for 15 seconds.
4. Lithe - After performing a rushed vault, break into a sprint of 150 % of your normal Running Movement speed for a maximum of 3 seconds. Lithe causes the Exhausted Status Effect for 60/50/40 seconds. Lithe cannot be used when Exhausted.
Build Reference: SpookyLoopz Dead By Daylight Gameplay
9. Resilience

Perk details: Increases your Action speeds in Repairing, Healing, Sabotaging, Unhooking, Vaulting, Cleansing, Opening, and Unlocking by 3/6/9 % when in the Injured State.
The perk Resilience is a very good perk to use as it can be very useful when you are injured, and therefore, you will be able to increase the progress of the game much faster than if you were to be in a healthy survivor state.
In Conclusion, it is a very useful perk to use; however, one of the disadvantages comes in when it sometimes can be quite risky when doing an objective whilst injured, as it makes it much easier for the killer to down you, therefore with combinations such as boon: circle of healing, med-kit or even self-care, you can use a tactic to heal yourself 99%, and then if the killer is coming towards your radius, you will be able to heal yourself in less than half a second, making the perk very effective and at the same time making it a less risk during the game.
Why Resilience Is Great:
- Resilience is a great perk which allows you to speed up the progress of the game very fast, by a maximum of 9% when in an injured state.
- It is a very effective perk in critical situations, where you will be able to do many things just before the killer comes, such as finishing the generator at the last moment or even healing yourself up before the killer comes and downs you.
- Resilience could be quite powerful if it were to be used by all the survivors in the game, which then the progress can stack up to 9%x4, which would then be 36% faster, which then can be a great combination with other perks such as prove thyself which can speed up the game even more.
Best Builds to use with the Resilience perk:
1. Resilience - Increases your Action speeds in Repairing, Healing, Sabotaging, Unhooking, Vaulting, Cleansing, Opening, and Unlocking by 3/6/9 % when in the Injured State.
2. Dead Hard - Press the Active Ability button while running injured to trigger the Endurance Status Effect for 0.5 seconds.
3. Balance Landing - When falling from great heights, you benefit from the following effects: Reduces the Stagger duration by 75 %. Suppresses Grunts of Exertion from falling. Upon landing, break into a sprint at 150 % of your normal Running Movement speed for 3 seconds. Balanced Landing causes the Exhausted Status Effect for 60/50/40 seconds.
4. Spine Chill - Whenever the Killer is within 36 metres of your location, Spine Chill activates, lighting up its icon. If there is a Terror Radius present, Spine Chill will reveal its intensity using its icon. If the Killer is within range and looking at you with a clear line of sight, you benefit from the following effect: Increases your Action speeds in Repairing, Healing, Sabotaging, Unhooking, Cleansing, Blessing, Opening, and Unlocking by 2/4/6 %. This effect lingers for 0.5 seconds.
Build Reference: Naymeti Dead By Daylight Gameplay
8. Adrenaline

Perk details: Once the Exit Gates are powered, instantly heal one Health State and sprint at 150 % of your normal Running Movement speed for 5 seconds. Adrenaline is on hold if you are disabled at the moment it triggers and will instead activate upon being freed. If playing against The Nightmare, Adrenaline will wake you from the Dream World upon activation. Adrenaline ignores an existing Exhaustion timer but causes the Exhausted Status Effect for 60/50/40 seconds.
The perk Adrenaline is one of the top 2 exhaustion perks in the game, and it is considered very powerful due to the effects where it has the possibility of healing you one health state and also allowing you to run at 150% of the normal running speed during the end-game, making it a very effective and possible escape from the killer, which would then allow you to use this speed to run to the exit gates, and then escape flawlessly.
In Conclusion, it is a perk that is useful but only during the end-game, which sometimes can feel like a waste as some games will not be able to reach that stage, unless you were to be the only survivor left and the hatch was to be closed by the killer, which would then allow you to run faster to the exit gates, and then open them to escape.
Why Adrenaline Is Great:
- Adrenaline can have a benefit during the end-game, where you will be able to heal yourself automatically and, at the same time, sprint at 150% for 5 seconds, allowing you to escape critical situations from the killer and escape safely.
- A very good solo perk which is very useful when other survivors are opening exit gates allowing you to carry the chase with the killer whilst healthy and then escape once injured or still healthy.
- Very useful for players and survivors who like to go on long chases with the killer, which is very useful during the end-game situation, allowing you to waste more time with the killer.
Best Builds to use with the Adrenaline perk:
1. Adrenaline - Once the Exit Gates are powered, instantly heal one Health State and sprint at 150 % of your normal Running Movement speed for 5 seconds. Adrenaline is on hold if you are disabled at the moment it triggers and will instead activate upon being freed. If playing against The Nightmare, Adrenaline will wake you from the Dream World upon activation. Adrenaline ignores an existing Exhaustion timer but causes the Exhausted Status Effect for 60/50/40 seconds.
2. Poised - After a Generator is completed, you will not leave any Scratch Marks for the next 6/8/10 seconds.
3. Sprint Burst - When starting to run, break into a sprint at 150 % of your normal Running Movement speed for 3 seconds. Sprint Burst causes the Exhausted Status Effect for 60/50/40 seconds.
4. Hope - As soon as the Exit Gates are powered, gain a 5/6/7 % Haste Status Effect.
Build Reference: Skap Dead By Daylight Gameplay
7. Built to Last

Perk details: Hiding inside a Locker for 14/13/12 seconds while carrying a depleted Item will replenish its Charges to 99 %. Each use of Built to Last reduces this percentage by -33 %.
The perk Built to Last allows you to use items over and over again for a maximum of 3 extra times, which is considered quite powerful, and one of the most powerful perks when it comes to the advantage of using items in the game.
All there is to do to activate the perk is to simply go into a locker for a few seconds and then come out to only see your items looking brand new, which can be quite useful when boosting up the progress of the game, such as when using a toolbox so that you can replenish the item, and therefore complete the generator even faster. The same situation goes with med-kits, where med-kits can be seen as a popular option to use with this perk, especially with super fast add-ons making this perk recommended.
In Conclusion, it is a perk that I would personally use, as it is considered my favourite, without having any disadvantages present except going into a few lockers for a few seconds, which can be quite risky if a killer was to be nearby and therefore catches you from the locker, which you have to be careful about, so its best to do in a safe situation. Apart from that, it is an amazing perk.
Why Built to Last Is Great:
- Built to last allows you to replenish items at least three times before completely running out, allowing you to use those items multiple times.
- It is a great perk to use with combinations such as the perk 'plunderer's instinct,' which will allow you to see chests and get better items, which is very useful where you can pretty much use unlimited items in the game, increasing the effectiveness of the progress.
- It has a very good combination with Streetwise, which allows you to at the same time use items efficiently, and then recharge them, allowing you to use the items for much longer and then be able to replenish them, useful when wanting to use the same item multiple times.
Best Builds to use with the Built to Last perk:
1. Built to Last - Hiding inside a Locker for 14/13/12 seconds while carrying a depleted Item will replenish its Charges to 99 %. Each use of Built to Last reduces this percentage by -33 %.
2. Prove Thyself - Increases your Repair speed by +15 % for each other Survivor within 4 metres of your location, up to a maximum of +45 %. This effect is also applied to all other Survivors within that range. Grants 50/75/100 % bonus Bloodpoints for Cooperative actions.
3. Empathy - The Auras of Survivors in the Injured State or in the Dying State within 64/96/128 metres of your location are revealed to you.
4. Streetwise - Increases the Efficiency of your Items by 15/20/25 %. Streetwise extends its effect to all other Survivors within 8 metres of your location and lingers for 15 seconds.
Build Reference: not Otzdarva Dead By Daylight Gameplay
6. Alert

Perk details: Your acute senses are on high alert. Whenever the Killer destroys a Pallet or a Breakable Wall or damages a Generator, their Aura is revealed to you for 3/4/5 seconds.
The perk Alert is considered to be one of the most underrated perks in the game, and not a lot of survivors were using this perk a long time ago; before the update, you would only see the killer when he was doing a break action, in other words only when he is breaking objects, within a specified distance of a maximum of 36 metres, and a cool-down of 30 seconds, making it one of the weakest perks in the game.
However, with this update, where you can see the killer's aura when he destroys a pallet, wall or generator with no cool-down whatsoever, makes it one of the most powerful aura-revealing perks in the, which comes to my conclusion that it is a perk that I would recommend to anybody as even I use it myself, and it literally activates once every 20 seconds, which allows me to track every movement of the killer which is great.
Why Alert Is Great:
- Alert is able to trigger the killer's aura multiple times, so if a killer was to keep breaking breakable objects, you would be able to see his aura and therefore keep track of the killer's movements.
- It is a very good perk when it comes to the contribution of other survivors in the game, allowing you to share information about the killer's position, making it easier to progress and win the game.
- It will allow you to see which generators the killer has kicked, giving you the opportunity to come back to the generator and touch it before it loses more progress on the regression.
Best Builds to use with the Alert perk:
1. Alert - Your acute senses are on high alert. Whenever the Killer destroys a Pallet or a Breakable Wall or damages a Generator, their Aura is revealed to you for 3/4/5 seconds.
2. Dark Sense - Each time a Generator is completed, Dark Sense activates: The Aura of the Killer is revealed to you for 5/7/10 seconds as soon as they come within 24 metres of you, after which Dark Sense deactivates.
3. Object of Obsession - Whenever the Killer reads your Aura, and for the same duration as they do so, Object of Obsession activates: The Killer's Aura is revealed to you. Increases your Action speeds in Repairing, Healing, and Cleansing by 2/4/6 %. If you are the Obsession, your Aura is automatically revealed to the Killer for 3 seconds every 30 seconds.
4. Kindred - While you are hooked: The Auras of all Survivors are revealed to one another. Whenever the Killer is within 8/12/16 metres of your Hook, their Aura is revealed to all Survivors. While any other Survivor is hooked: The Auras of all other Survivors are revealed to you. Whenever the Killer is within 8/12/16 metres of the hooked Survivor, their Aura is revealed to you.
Build Reference: Not JRM Dead By Daylight Gameplay
5. Boon: Circle of Healing

Perk details: Soft chimes ring out within a radius of 24 metres. Survivors inside the Boon Totem's range benefit from the following effects: Increased all Healing speeds by 40/45/50 %. Unlocks the Self-Care ability, allowing you to self-heal without needing a Med-Kit at 50 % of the normal Healing speed.
The perk Boon: Circle of Healing is considered to be one of the best boon perks in the game, just after boon: shadow step, and the reason why the circle of healing perk is considered very powerful and in the top 5 is the fact that it can boost healing speeds which affects every survivor in the game and can be generated up to 5 times, with the five dull totems there are on the map.
For instance, if a survivor was to finish a chase with the killer, the survivor could automatically come to the boon totem that has been placed, and within 24 metres, it will be able to heal itself without the need for medkits or any support, and therefore go back to chase with the killer or go do a generator.
In Conclusion, it is a perk that I would recommend for every survivor to use; however, it is recommended to use when playing together with the survivors so that the perk can be as effective as possible to avoid any other survivor bringing anti-boon perks, which would help them destroy the boon rather than booming them.
Why Boon: Circle of Healing Is Great:
- A perk that can affect every survivor within the range of the boon totem, which is 24 metres, making it a great cooperation perk.
- The perk can be used anytime & anywhere where there is an available dull totem, allowing you to use this perk up to 5 totems across the map.
- Allows you to heal yourself without having to use any sort of med-kits, making it a great speedy self-care perk.
Best Builds to use with the Boon: Circle of Healing perk:
1. Boon: Circle of Healing - Soft chimes ring out within a radius of 24 metres. Survivors inside the Boon Totem's range benefit from the following effects: Increased all Healing speeds by 40/45/50 %. Unlocks the Self-Care ability, allowing you to self-heal without needing a Med-Kit at 50 % of the normal Healing speed.
2. Botany Knowledge - Increases your Healing speed by 30/40/50 %. Reduces the Healing efficiency of Med-Kits by -20 %.
3. Desperate Measures - Increases Healing and Unhooking speeds by 10/12/14 % for each injured, hooked, or dying Survivor, up to a maximum of 40/48/56 %.
4. Self-care - Unlocks the Self-Care ability, allowing you to self-heal without needing a Med-Kit at 25/30/35 % of the normal Healing speed.
Build Reference: PROBZZ Dead By Daylight Gameplay
4. Off the Record

Perk details: After being unhooked or unhooking yourself, Off the Record activates for the next 60/70/80 seconds: It prevents your Aura from being revealed to the Killer if they attempt to read it. Suppresses Grunts of Pain when injured. Grants the Endurance Status Effect. This effect is cancelled prematurely if you perform a Conspicuous Action.
The perk Off the Record is considered to be one of the most powerful perks in the game as its main power comes to overall isolation from the killer; in other words, it is pretty much a guarantee that you will escape safely from the hook, as you have a combination of powers which would make it nearly impossible for the killer to down you.
In Conclusion, it is one of the most powerful perks that is used in pretty much every-game situation, especially when it comes to killers with scourge hook perks, where they will be unable to see your aura in any way possible.
Why Off the Record Is Great:
- Off the record is a great perk which allows you to hide your aura from the killer, using the advantage against the killer's perks such as scourge hook: floods of rage, which allows the killer to see the aura of all survivors, which then would make it impossible to see the survivor which has just been unhooked, making it very powerful.
- It grants an endurance status effect for a maximum of 80 seconds, which is great against tunnelling from the killers.
- It suppresses grunts of pain, which would make it much harder for the killer to find that unhooked survivor, and if it does, it would then be protected by the endurance status effect which is achieved from the perk.
Best Builds to use with the Off the Record perk:
1. Off the Record - After being unhooked or unhooking yourself, Off the Record activates for the next 60/70/80 seconds: Prevents your Aura from being revealed to the Killer if they attempt to read it. Suppresses Grunts of Pain when injured. Grants the Endurance Status Effect. This effect is cancelled prematurely if you perform a Conspicuous Action.
2. Dead Hard - Press the Active Ability button while running injured to trigger the Endurance Status Effect for 0.5 seconds.
3. Decisive Strike - After being unhooked or unhooking yourself, Decisive Strike activates for the next 40/50/60 seconds: When being grabbed or picked up by the Killer, succeed a Skill Check to escape their grasp, stunning them for 3 seconds automatically. Successfully stunning the Killer will disable Decisive Strike for the remainder of the Trial and result in you becoming the Obsession.
4. Mettle of Man - After triggering your second Protection Hit, Mettle of Man activates: Grants the Endurance Status Effect. This effect is cancelled prematurely if you perform a Conspicuous Action. As long as you have Endurance, your Aura is revealed to the Killer whenever you are farther than 12/14/16 metres from them.
Build Reference: Dowsey Dead By Daylight Gameplay
3. Lithe

Perk details: After performing a rushed vault, break into a sprint of 150 % of your normal Running Movement speed for a maximum of 3 seconds. Lithe causes the Exhausted Status Effect for 60/50/40 seconds. Lithe cannot be used when Exhausted.
The perk Lithe is considered to be one of the most powerful exhaustion perks out there in the game, and for no bad reason. First of all, unlike other exhaustion perks, you can control its sprint, where you are able to activate it only after you perform a rushed action over a window or pallet, which is incredibly powerful as in these situations, it is those moments where you can get away from the killer as far as possible because it would either be at this moment where the killer is either destroying the pallet or slowly vaulting the window.
In Conclusion, it is one of the best-recommended exhaustion perks that I would recommend for everyone to use, as it is a perk that is guaranteed to be used in pretty much every game situation and, nonetheless, most importantly, on every map, as every map has pallets and windows, unlike the perk balance landing where you have to find some sort of elevation, which not every map has.
Why Lithe Is Great:
- You will be able to use lithe in critical chasing situations, such as when vaulting windows and pallets, making it very unpredictable against the killer.
- It is one of the best exhaustion perks in the game, as it allows you to sprint to a whole another location with having it under control, unlike perks such as dead hard which you will stay in the same place, or sprint burst, which activates when running, which can sometimes be useless in the specified environment.
- One of the easiest exhaustion perks to use in the game, which is very helpful for new survivors, who are learning how to time exhaustion perks appropriately, as perks such as sprint burst, would be very hard to control.
Best Builds to use with the Lithe perk:
1. Lithe - After performing a rushed vault, break into a sprint of 150 % of your normal Running Movement speed for a maximum of 3 seconds. Lithe causes the Exhausted Status Effect for 60/50/40 seconds. Lithe cannot be used when Exhausted.
2. Vigil - Increases your Recovery rate from Blindness, Broken, Exhaustion, Exposed, Haemorrhage, Hindered, and Oblivious Status Effects by 20/25/30 %. This effect also applies to all other Survivors within 8 metres of your location and lingers for 15 seconds.
3. Iron Will - Reduces the volume of Grunts of Pain while in the Injured State by 25/50/75 %.
4. Self-Aware - You walk 10/15/20 % faster and can see your own Scratch Marks.
Build Reference: fubs Dead By Daylight Gameplay
2. Kindred

Perk details: Unlocks potential in your Aura-reading ability: While you are hooked: The Auras of all Survivors are revealed to one another. Whenever the Killer is within 8/12/16 metres of your Hook, their Aura is revealed to all Survivors. While any other Survivor is hooked: The Auras of all other Survivors are revealed to you. Whenever the Killer is within 8/12/16 metres of the hooked Survivor, their Aura is revealed to you.
The perk Kindred is a very useful cooperative perk and is considered one of the most powerful perks when it comes to playing solo, as it would reveal the aura of the killer who is around your hook, otherwise when being unable to communicate with the other survivors.
Personally, it is a perk that I would recommend using so that it would make it much easier for the survivors to rescue you from the hook. To summarise it in conclusion, it is a perk that is considered to be one of the most powerful aura-revealing perks and is incredibly powerful when it comes to anti-camping situations.
Why Kindred Is Great:
- Kindred is considered one of the best cooperative perks in the game, which allows other survivors to see the aura of the killer within a maximum of 16 meters, which is very useful for seeing if the killer is camping.
- A higher possibility of getting unhooked in time, as it would make it more comfortable for other survivors to unhook you, as they would see if the killer is nearby the hook.
- It allows other survivors to be proactive during the game as if the killer was camping on the hook; for instance, they would concentrate on repairing the generators until the time comes when coming to save the survivor.
Best Builds to use with the Kindred perk:
1. Kindred - Unlocks potential in your Aura-reading ability: While you are hooked: The Auras of all Survivors are revealed to one another. Whenever the Killer is within 8/12/16 metres of your Hook, their Aura is revealed to all Survivors. While any other Survivor is hooked: The Auras of all other Survivors are revealed to you. Whenever the Killer is within 8/12/16 metres of the hooked Survivor, their Aura is revealed to you.
2. Bond - The Auras of all other Survivors within 20/28/36 metres of your location are revealed to you.
3. Adrenaline - Once the Exit Gates are powered, instantly heal one Health State and sprint at 150 % of your normal Running Movement speed for 5 seconds. Adrenaline is on hold if you are disabled at the moment it triggers and will instead activate upon being freed. If playing against The Nightmare, Adrenaline will wake you from the Dream World upon activation. Adrenaline ignores an existing Exhaustion timer but causes the Exhausted Status Effect for 60/50/40 seconds.
4. Open-Handed - Open-Handed increases all Aura-reading ranges by 8/12/16 metres. Open-Handed does not stack with other instances of itself.
Build Reference: Luboatm Dead By Daylight Gameplay
1. Prove Thyself

Perk details: Increases your Repair speed by +15 % for each other Survivor within 4 metres of your location, up to a maximum of +45 %. This effect is also applied to all other Survivors within that range. Grants 50/75/100 % bonus Bloodpoints for Cooperative actions. Call of Brine is considered to be one of the most powerful perks in the game, and there are good reasons why it is considered in such a way, making it a perk worth having for every killer.
The perk Prove Thyself is considered to be the most powerful perk in the game, and there are many reasons why this perk is in the number one spot in this scenario. First of all, the perk allows for a clean boost which affects a maximum of three stackable survivors together, for a maximum of 45% boost, which is very powerful and makes actions be completed nearly twice as fast.
Nonetheless, this perk can be easily combined with other perks to make the boost even faster with perks such as resilience, whereas with three survivors using these perks, it can claim up to 82% extra speed, which is nearly twice as fast, which is incredible.
In Conclusion, it is a perk that I would recommend using, and when playing with survivor friends, it is recommended that only one of the survivors take this perk as it is not stackable, and therefore the perks would be treated as unusable. Nonetheless, it is an amazing perk that will considerably increase the progression of the game in many scenarios, making it much easier to escape.
Why Prove Thyself Is Great:
- .Prove thyself is a perk that allows you to progress through the game very fast and is considered one of the best cooperative perks in the game.
- It will allow you to speed through generators with other survivors, up to a maximum of 45% when there are three or more survivors on the generator, creating a smaller possibility of the killer reaching the generator in time before it finishes.
- You will receive 100% bonus blood points, which is very useful when you want to upgrade the blood web much faster or be in a higher ranking on the table at the end of the match.
Best Builds to use with the Prove Thyself perk:
1. Prove Thyself - Increases your Repair speed by +15 % for each other Survivor within 4 metres of your location, up to a maximum of +45 %. This effect is also applied to all other Survivors within that range. Grants 50/75/100 % bonus Bloodpoints for Cooperative actions. Call of Brine is considered to be one of the most powerful perks in the game, and there are good reasons why it is considered in such a way, making it a perk worth having for every killer.
2. Resilience - Increases your Action speeds in Repairing, Healing, Sabotaging, Unhooking, Vaulting, Cleansing, Opening, and Unlocking by 3/6/9 % when in the Injured State.
3. Dead Hard - Press the Active Ability button while running injured to trigger the Endurance Status Effect for 0.5 seconds.
4. Iron Will - Reduces the volume of Grunts of Pain while in the Injured State by 25/50/75 %.
Build Reference: Ayrun Dead By Daylight Gameplay
You May Also Be Interested In:
- Dead by Daylight Survivor Guide: Top 25 Tips
- Dead by Daylight Killers Guide: Top 25 Tips
- [Top 10] DbD Best Killer Builds That Are Great!
- [Top 100] Dead By Daylight Best Names
- [Top 10] DbD Best Survivor Builds That Are OP!
- [Top 10] DbD Best Killers And Why They're Good
- [Top 15] DbD Best Killer Perks And Why They're Good
- [Top 15] DbD Best Survivor Perks And Why They're Good
- [Top 10] DbD Best Survivors And Why They're Good
- [Top 10] DbD Best Survivor Builds That Are Great
- [Top 15] Ghost Games To Play Today
- [Top 15] Horror Movies That Were Books
- [Top 15] Best Horror Movies That Were Banned
- [Top 5] Dead By Daylight Most Fun Survivors
- [Top 5] Dead By Daylight Best Jane Romero Builds
- [Top 5] Dead By Daylight Best Meg Thomas Builds
- [Top 5] Dead By Daylight Best Claudette Morel Builds
- [Top 5] Dead by Daylight Best Jake Park Builds
- [Top 5] Dead By Daylight Best Nea Karlsson Builds
- [Top 5] Dead By Daylight Best Laurie Strode Builds
- [Top 5] Dead By Daylight Best Bill Overbeck Builds
- [Top 5] Dead By Daylight Best Feng Min Builds
- [Top 5] Dead By Daylight Best David King Builds

