#1 Display Mode To Fullscreen
To prevent your monitor from being drained by other applications, you should definitely put your display mode to fullscreen, or at the least borderless window
- More FPS during the game, making the pictures smoother
How to apply:
- Go into the video settings of Overwatch
- Drop down the options of Display Mode
- Select Fullscreen
#2 Native Resolution
Many players cut down their resolution under the impression it would make the game run better, but that is actually untrue. On the other hand, you shouldn‘t set the resolution higher than your monitor can run. Therefore, stick to your native resolution.
- Better game experience
- Prevent cutting down or overextending on your monitor’s abilities
How to apply:
- Go into the video settings of Overwatch
- Drop down options of Resolution
- Select highest resolution (should be the native one)
#3 Limit The FPS
This setting is again, all about the smoothness of the game. To prevent custom limits that the monitor might not be able to handle, set the limit to Display-based.
- Higher FPS without troubleshooting your monitor
How to apply:
- Go into video settings of Overwatch
- Drop down options of Limit FPS
- Select Display-Based
#4 Render Scale
The silhouette of the enemies and the legibility of the picture are what changes here. Depending on personal preference, changing the render scale might be worth a try.
- Lowering the render scale will:
- Make enemy outlines thicker
- In exchange for slightly blurrier pictures
- Setting the render scale higher will:
- Smoothen out the pictures
- BUT you will not be able to see the outline of enemies very well
How to apply:
- Go into video settings of Overwatch
- Drop down options of Render Scale
- 50% - is very low, only few people like having the blurriness this strong
- 75% - is recommended for better enemy-visibility and blurriness is not too strong
- 100% - is the standard setting for most
#5 Visible Shadows
Have you always wanted to know how the enemy knows you are hiding behind a corner? They are probably using this setting to see your shadow on the ground without being able to see you.
- See other players‘ shadows on the ground
- Be prepared for the ambush by using this pro-trick
How to apply:
- Go into video settings of Overwatch
- Set Local Fog to low
- Set Dynamic Reflections to off
- Set Shadow Detail to medium

#6 Higher FPS Through Graphics
Want to make sure your game runs smoother with minimal changes in the graphics?
Here’s how.
- Better game experience through higher FPS
How to apply:
- Go into video settings of Overwatch
- Set Model Detail to low
- Set Effects Detail to low
- Set Lighting Quality to low
- Set Antialiasing Quality to off
- Set Refraction Quality to low
- Set Screenshot Quality to 1x Resolution
#7 Make Allies More Visible
Do you always lose sight of your teammates in the heat of a battle and want to be able to protect them when they are struggling? Then use these settings most pros use on default.
- Be able to see your allies even through walls
- Be able to see your allies health-bars at all times
This is how:
- Go into video settings of Overwatch
- Scroll down to Hero
- Set Allied health-bars to always
- Set Friendly Outlines to always
#8 Dolby Atmos For Headphones
If your headphones allow, you should definitely try to get used to this feature. Prevent surprise attacks and panicked swiping using the surround sound feature.
- Enables you to see with your ears
Here‘s what to do:
- Go into sound settings of Overwatch
- Scroll all the way down
- Turn Dolby Atmos For Headphones to on
#9 Lower Waypoint Opacity
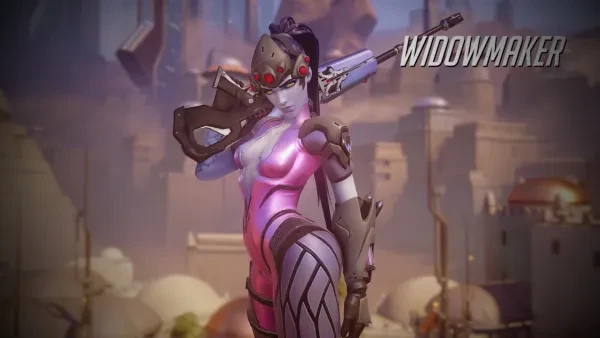
Want to aim for the Widow hiding behind the waypoint without using the Hanzo ult to kill ONLY ONE sniper? Then lower the opacity of your waypoints.
- Widens visibility around the point, especially from further away on the map
This is what you do:
- Go into gameplay settings of Overwatch
- Lower the slider ‘waypoint opacity’
#10 Crosshair Personalisation
To improve your aim and make you the best shot in the battle you should customise your Crosshairs according to your preferences.
- Enable clean shots
- Better aim
How to apply:
- Go into control settings of Overwatch
- Scroll down to Reticle
- Select form
- Draw sliders for ultimate customisation
#11 Mouse Sensitivity
During the aim process , many gamers talk about flick shots, but how do you really manage to pull off these pro-moves? Well, it depends on the sensitivity of your mouse.
- Prevent aim jitters
- Achieve easier kills
Here‘s how:
- Go into control settings of Overwatch
- Draw slider along to change sensitivity
- Select hero for individual mouse sensitivity
Apply Individual Hero Settings
If it‘s hard for you to balance the abilities with one hand on the keyboard or you want to beat the enemy to the punch, try using mouse keys for some heroes‘ abilities. Here are some examples of good changes for specific heroes.
#12 Tracer
Bind Tracer‘s ultimate ability ‘Pulse Bomb’ to a mouse key to assure perfect placement in battle
This is how:
- Go into control settings in Overwatch
- Drop down the hero selection bar
- Select Tracer
- Click empty key field ‘Ability 3’ and enter mouse key

Pulse bomb is charging up — Tracer‘s ult is best kept on the mouse keys
#13 Ana sleepdart on mouse
Bind Ana‘s ‘Sleepdart’ to a mouse key for reflexive defense against sneak attacks
How to apply
- Go into controls settings in Overwatch
- Drop down the hero selection bar
- Select Ana
- Click empty key field ‘Ability 1’ and enter mouse key
#14 Lucio Controls
Bind Lucio‘s jump on mousewheel and right click to prevent falling to be double secure in your movement
- Bind ‘Boop’ to the middle button of the mouse for even better pushes
What to do:
- Go into controls setting of Overwatch
- Drop down the hero selection bar
- Select Lucio
- Click empty key field ‘Jump’ and enter the mousewheel
#15 Mercy Custom Settings
Turn all of Mercy‘s custom settings off for more movement control during battles
How to apply:
- Go into controls setting of Overwatch
- Drop down the hero selection bar
- Select Mercy
- Turn all custom settings to off (Guardian Angel, Toggle Beam Connection)
#16 Phara‘s ‘Concussion’ on Mouse
Place Phara’s secondary ability on the mouse to combine the flick and boost in one movement
This is what you do:
- Go into controls settings of Overwatch
- Drop down the hero selection bar
- Select Phara
- Click empty key field ‘Ability 2’ and enter a mouse key
#17 Winston’s quick melee
Place the quick melee or the leap on the mouse for better control during battle
How to apply:
- Go into controls settings of Overwatch
- Drop down the hero selection bar
- Select Winston
- Click empty key field ‘Quick melee’ and enter a mouse key
#18 Zenyatta‘s orbs on mousewheel
Be able to quickly catch enemies and allies with your healing and damage-boosting orbs
Here‘s how:
- Go into controls settings of Overwatch
- Drop down the hero selection bar
- Select Zenyatta
- Scroll down to ‘hero’
- Click empty key fields ‘Orb sensitivity’ and enter mousewheel up or down
#19 Junkrat‘s ultimate
Turn ‘automatic wall climb’ off for Junkrat’s ult, to enable silent ambushes on the usually loud rip-tire.
How to apply:
- Go into controls settings of Overwatch
- Drop down the hero selection bar
- Select Junkrat
- Scroll down to ‘hero’
- Click empty key field ‘automatic wall climb’ to off
#20 Ana nano boost sensitivity
Change the sensitivity of Ana’s ult, to make the placement more precise and prevents allies from interfering
- higher accuracy
What to do:
- Go into controls settings of Overwatch
- Drop down the hero selection bar
- Select Ana
- Scroll down to ‘hero’
- Slide ‘Nano Boost Sensitivity’ to a setting of your choice
#21 Display Performance
If you want to be able to see why your game might be lagging or if you are running on your best settings, then enable your display performance.
- See your FPS on screen
- See your Ping on screen while in game
Here‘s how to use it:
- Go into visual settings of Overwatch
- Change ‘Show Network Latency’ and ‘Show FPS’ to on
#22 Visync
All of the above settings are included to make your game run smoother and to give you an advantage over other players. So to prevent input lag, make sure you also follow this setting.
- Prevent input lag
How to apply:
- Go into visual settings of Overwatch
- Change ‘Visync’ to off
#23 Push to talk
Especially in the ranked games, voice chat is gaining more and more importance. Communicating clearly can be a game changer. To filter out unnecessary background noise, put your voice chat in Push-to-talk
- Filter out unnecessary background noise
This is what you do:
- Go into sound settings of Overwatch
- Change ‘Voice chat mode’ to push-to-talk
#24 Consider using hotkeys
Overwatch is as a first-person shooter a fast game with many actions being required at the same time. It can get overwhelming to play with too many keys on the keyboard, so to reduce that, many pros use hotkeys.
- Hotkeys enable you to bind actions to mouse keys
- Quicker reaction
#25 Baptiste hotkeys
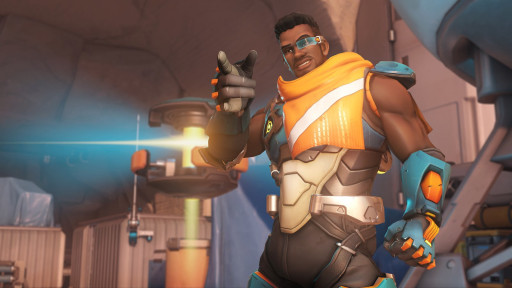
An ability most suited for a hotkey is probably Baptiste‘s ‘Regenerative Burst’. With it he can both heal himself and his allies around him, therefore it should be easy to use in an emergency situation.
How to apply
- Go into controls setting of Overwatch
- Drop down the hero selection bar
- Select Baptiste
- Click empty key field ‘Ability 1’ and enter your hotkey of choice

