![[Top 15] Genshin Impact Best Team Comps That Are Powerful The six heroes of Natlan](/sites/default/files/styles/responsive_image_600xauto/public/2024-10/IMG_9603.JPEG.webp?itok=n8fB0I3C)
The daily grind can be arduous, especially if you are trying to farm for ascension materials. But with a good team, any task can be completed with ease. In this article we’ll review the most powerful teams and how they function to help those of you who are on the struggle bus.
While most game modes and bosses are situational, these comps will be able to bulldoze almost anything. No matter if you’re aiming to descend the Spiral Abyss or conquer the Imaginarium Theatre, these powerhouse teams can assist any goal. Here are 15 of the most powerful unit combos that you can make to slice through whatever challenge you will come across.
15. Nilou + Dendro Traveler + Nahida + Sangonomiya Kokomi
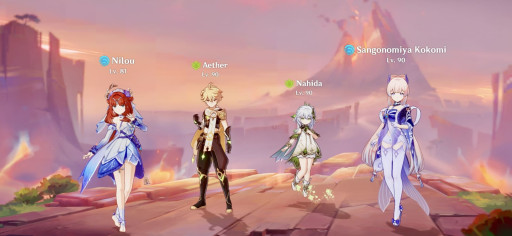
Nilou Super-Bloom
Nilou has a very restrictive team but following those restrictions can easily give one of the best teams at low investments for Genshin Impact especially when against multiple enemies. Put Nilou with Hydro and Dendro off-fields and healer to form a powerful team.
What this team is great for:
- Event challenges that require major damage output.
- Bosses that are weak to Dendro and Hydro.
- Great for both single and multiple targets as all characters provide AOE damage.
How the team works:
- First start with Nahida and use her All Schemes to Know.
- Then use Kokomi’s Kurage’s Oath.
- Use Dendro Traveler whenever you need an extra Dendro application as their burst applies it consistently during its duration.
- Switch to Nilou whenever Dendro Cores are on the field as her passive, Golden Chalice’s Bounty, will cause them to burst, dealing considerable Dendro damage.
- Finally, be mindful of your HP as the bountiful core Dendro Cores that Nilou’s passive bursts, will deal considerable damage to your team as well.
Nilou Super-Bloom team details:
-Nilou, 5🌟 Sword:
-Weapon: Key of Khaj-Nisut
-Artifacts: Vourukasha’s Glow x4
- Sands: HP%
- Goblet: HP%
- Circlet: HP%
- Sub Stats: Energy Recharge, Elemental Mastery, HP%
-Dendro Traveler, 5🌟 Sword:
-Weapon: Freedom-Sworn
-Artifacts: Deepwood Memories x4
- Sands: Energy Recharge or Elemental Mastery
- Goblet: Dendro DMG Bonus
- Circlet: CRIT Rate or CRIT DMG
- Sub Stats: Energy Recharge, Elemental Mastery, CRIT Rate, CRIT DMG
-Nahida, 5🌟 Catalyst
-Weapon: A Thousand Floating Dreams
-Artifacts: Deepwood Memories x4
- Sands: Elemental Mastery
- Goblet: Elemental Mastery or Dendro DMG Bonus
- Circlet: CRIT Rate or Crit DMG or Elemental Mastery
- Sub Stats: Energy Recharge, CRIT Rate, Crit DMG, Elemental Mastery
-Sangonomiya Kokomi, 5🌟 Catalyst:
-Weapon: Everlasting Moonglow
-Artifacts: Ocean-Hued Clam x4
- Sands: HP% or Energy Recharge
- Goblet: Hydro DMG Bonus
- Circlet: Healing Bonus or HP%
- Sub Stats: Energy Recharge, Elemental Mastery, HP%
14. Neuvillette + Furina + Nahida + Kuki Shinobu
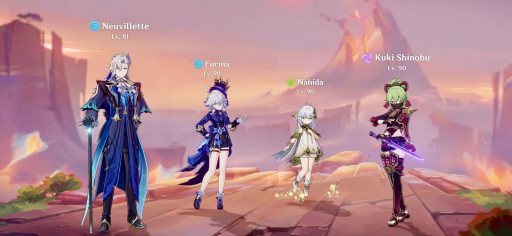
Hyperbloom
Hyperbloom teams focus on creating Hyperbloom to deal damage to enemies. These teams are mostly composed of Hydro, Dendro, and Electro + one on-fielder. Characters that do not disturb the Hyperbloom can be used as an on-fielder in this team.
What this team is great for:
- Event challenges that require major damage output.
- Bosses that do not require elemental reactions, since Geo only reacts as Crystalize.
- Great for both single and multiple targets as all characters provide AOE damage.
How the team works:
- First start with Nahida and use her All Schemes to Know.
- Then use Furina and activate her Salon Solitaire.
- Use Kuki Shinobu’s Sanctifying Ring for a heal and to pop the Dendro Cores.
- Switch to Neuvillette for your main DPS and Hydro application.
- Finally make sure to use Nahida and Furina’s bursts whenever possible for damage buffs.
Hyperbloom team details:
-Neuvillette, 5🌟 Catalyst:
-Weapon: Tome of the Eternal Flow
-Artifacts: Marechaussee Hunter x4
- Sands: HP%
- Goblet: Hydro DMG Bonus or HP%
- Circlet: CRIT Rate or CRIT DMG
- Sub Stats: Energy Recharge, Elemental Mastery, CRIT Rate, CRIT DMG, HP%
-Furina, 5🌟 Sword:
-Weapon: Splendor of Tranquil Waters
-Artifacts: Golden Troupe x4
- Sands: Energy Recharge or HP%
- Goblet: HP% or Hydro DMG Bonus
- Circlet: CRIT Rate or CRIT DMG
- Sub Stats: CRIT Rate, CRIT DMG, HP%, Energy Recharge, Elemental Mastery
-Nahida, 5🌟 Catalyst
-Weapon: A Thousand Floating Dreams
-Artifacts: Deepwood Memories x4
- Sands: Elemental Mastery
- Goblet: Elemental Mastery or Dendro DMG Bonus
- Circlet: CRIT Rate or Crit DMG or Elemental Mastery
- Sub Stats: Energy Recharge, CRIT Rate, Crit DMG, Elemental Mastery
-Kuki Shinobu, 4🌟 Sword:
-Weapon: Freedom-Sworn
-Artifacts: Tenacity of the Millelith x4
- Sands: HP%
- Goblet: HP% or Electro DMG Bonus
- Circlet: Healing Bonus or HP%
- Sub Stats: Energy Recharge, Elemental Mastery, HP%
13. Kamisato Ayaka + Shenhe + Furina + Jean
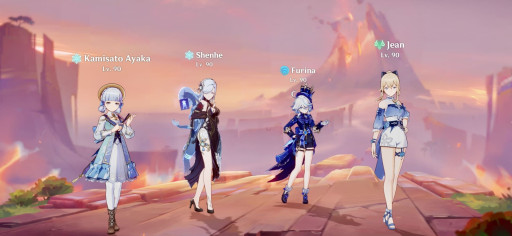
Ayaka-Freeze
This team focuses on increasing the damage of Kamisato Ayaka with supports and using Freeze to keep enemies in-place allowing the Burst of Kamisato Ayaka to deal a tremendous amount of damage.
What this team is great for:
- Event challenges that require major damage output.
- Bosses that are weak to Cryo.
- Great for both single and multiple targets as Furina and Shenhe can provide AOE damage.
How the team works:
- First start with Furina and activate her Salon Solitaire.
- Then use Shenhe’s Divine Maiden’s Deliverance.
- Use Kamisato Ayaka to deal damage.
- Switch to Jean whenever her burst is ready to heal and increase Furina’s passive buff.
- Finally make sure to use Kamisato Ayaka’s dash to infuse her basic attacks with Cryo.
Ayaka-Freeze team details:
-Kamisato Ayaka, 5🌟 Sword:
-Weapon: Mistsplitter Reforged
-Artifacts: Blizzard Strayer x4
- Sands: ATK%
- Goblet: Cryo DMG Bonus
- Circlet: CRIT DMG
- Sub Stats: Energy Recharge, CRIT Rate, CRIT DMG, ATK%
-Shenhe, 5🌟 Polearm:
-Weapon: Calamity Queller
-Artifacts: Gladiator’s Finale x2 & Shimenawa’s Reminiscence x2
- Sands: Energy Recharge or ATK%
- Goblet: ATK%
- Circlet: ATK%
- Sub Stats: ATK%, Energy Recharge
-Furina, 5🌟 Sword:
-Weapon: Splendor of Tranquil Waters
-Artifacts: Golden Troupe x4
- Sands: Energy Recharge or HP%
- Goblet: HP% or Hydro DMG Bonus
- Circlet: CRIT Rate or CRIT DMG
- Sub Stats: CRIT Rate, CRIT DMG, HP%, Energy Recharge, Elemental Mastery
-Jean, 5🌟 Sword:
-Weapon: Freedom-Sworn
-Artifacts: Viridescent Venerer x4
- Sands: Energy Recharge or ATK%
- Goblet: Anemo DMG Bonus
- Circlet: Healing Bonus or CRIT Rate or CRIT DMG
- Sub Stats: CRIT Rate, CRIT DMG, Energy Recharge, ATK%
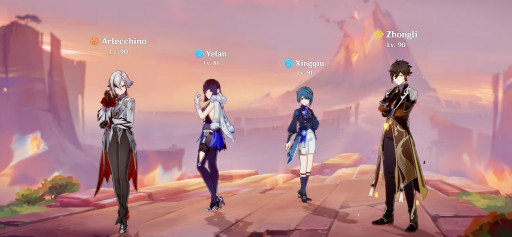
12. Arlecchino + Yelan + Xingqiu + Zhongli
Double-Hydro
Double Hydro teams mainly use Yelan and Xingqiu (sometimes replaced by Furina) to activate Hydro Resonance and boost reaction damage. Yelan and Xingqiu alone already produce very powerful off-field damage but they also enable various reactions like Vaporize. The Support character is flex and should be chosen depending on the Main DPS.
What this team is great for:
- Event challenges that require major damage output and swift completion.
- Bosses that are weak to Pyro damage.
- Great for both single and multiple targets as Arlecchino can slice through enemies swiftly.
How the team works:
- First start with Zhongli and activate his shield.
- Then use Yelan to apply Hydro with her skill.
- Use Xingqiu’s skill to help keep Hydro applied.
- Switch to Arlecchino to Vaporize with Pyro damage.
- Finally use Yelan and Xingqiu’s bursts to sustain Hydro application.
Double-Hydro team details:
-Arlecchino, 5🌟 Polearm:
-Weapon: Crimson Moon’s Semblance
-Artifacts: Fragment of Harmonic Whimsy x4
- Sands: ATK%
- Goblet: Pyro DMG Bonus
- Circlet: CRIT Rate or CRIT DMG
- Sub Stats: Energy Recharge, CRIT Rate, CRIT DMG, ATK%
-Yelan, 5🌟 Bow:
-Weapon: Aqua Simulacra
-Artifacts: Emblem of Severed Fate x4
- Sands: HP% or Energy Recharge
- Goblet: Hydro DMG Bonus
- Circlet: CRIT Rate or CRIT DMG
- Sub Stats: HP%, CRIT Rate, CRIT DMG, Energy Recharge
-Xingqiu, 4🌟 Sword:
-Weapon: Sacrificial Sword
-Artifacts: Emblem of Severed Fate x4
- Sands: ATK% or Energy Recharge
- Goblet: Hydro DMG Bonus
- Circlet: CRIT Rate or CRIT DMG
- Sub Stats: ATK%, CRIT Rate, CRIT DMG, Energy Recharge, Elemental Mastery
-Zhongli, 5🌟 Polearm:
-Weapon: Black Tassel
-Artifacts: Tenacity of the Millelith x4
- Sands: HP%
- Goblet: HP%
- Circlet: HP%
- Sub Stats: HP%, HP, Energy Recharge
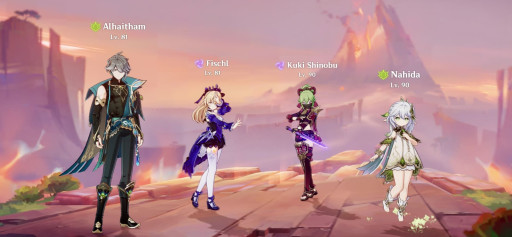
11. Alhaitham + Fischl + Kuki Shinobu + Nahida
Alhaitham Spread
Alhaitham is an amazing DPS for single and multiple targets. To achieve high damage however, you need to produce a Spread reaction. Because of Alhaitham's mirrors and abilities, this team is amazing against AoE and single target.
What this team is great for:
- Event challenges that require major damage output.
- Bosses that are weak to Electro or Dendro.
- Great for both single and multiple targets as Alhaitham can provide AOE damage.
How the team works:
- First start with Nahida and use her All Schemes to Know.
- Then use Fischl and summon Oz.
- Use Kuki Shinobu’s Sanctifying Ring for extra Electro application and a heal for sustainability.
- Switch to Alhaitham and use his burst to deal major Dendro damage.
- Finally make sure to keep his Chisel-Light Mirrors going as long as possible by using his skill whenever you lose a stack.
Alhaitham Spread team details:
-Alhaitham, 5🌟 Sword:
-Weapon: Light of Foliar Incision
-Artifacts: Gilded Dreams x4
- Sands: Elemental Mastery
- Goblet: Dendro DMG Bonus
- Circlet: CRIT Rate or CRIT DMG
- Sub Stats: Energy Recharge, Elemental Mastery, CRIT Rate, CRIT DMG, ATK%
-Fischl, 4🌟 Bow:
-Weapon: Polar Star
-Artifacts: Golden Troupe x4
- Sands: Elemental Mastery or ATK%
- Goblet: Electro DMG Bonus
- Circlet: CRIT Rate or CRIT DMG
- Sub Stats: CRIT Rate, CRIT DMG, ATK%
-Kuki Shinobu, 4🌟 Sword:
-Weapon: Freedom-Sworn
-Artifacts: Tenacity of the Millelith x4
- Sands: HP%
- Goblet: HP% or Electro DMG Bonus
- Circlet: Healing Bonus or HP%
- Sub Stats: Energy Recharge, Elemental Mastery, HP%
-Nahida, 5🌟 Catalyst
-Weapon: A Thousand Floating Dreams
-Artifacts: Deepwood Memories x4
- Sands: Elemental Mastery
- Goblet: Elemental Mastery or Dendro DMG Bonus
- Circlet: CRIT Rate or Crit DMG or Elemental Mastery
- Sub Stats: Energy Recharge, CRIT Rate, Crit DMG, Elemental Mastery
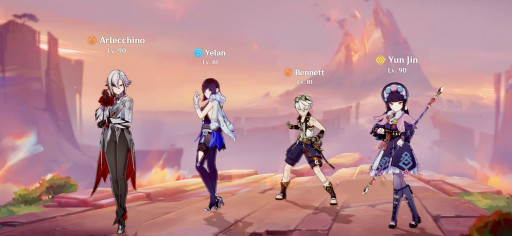
10. Arlecchino + Yelan + Bennett + Yun Jin
Reverse Vape
Vaporize teams are mostly composed of a Hydro character and a Pyro character to deal amplified damage. Pairing it with support characters to buff damage or reduce Hydro and Pyro Resistance will make the team damage better. The other slot can either be a shielder or a healer for sustenance.
What this team is great for:
- Event challenges that require major damage output and swift completion.
- Bosses that are weak to Pyro damage.
- Great for both single and multiple targets as Arlecchino can slice through enemies swiftly.
How the team works:
- First start with Yelan to apply Hydro with her skill.
- Then use Arlecchino to Vaporize with Pyro damage.
- Use Yun Jin to provide shields as needed.
- Switch to Bennett for more Pyro application and for his burst.
- Finally use Yelan’s burst whenever you can.
Reverse Vape team details:
-Arlecchino, 5🌟 Polearm:
-Weapon: Crimson Moon’s Semblance
-Artifacts: Fragment of Harmonic Whimsy x4
- Sands: ATK%
- Goblet: Pyro DMG Bonus
- Circlet: CRIT Rate or CRIT DMG
- Sub Stats: Energy Recharge, CRIT Rate, CRIT DMG, ATK%
-Yelan, 5🌟 Bow:
-Weapon: Aqua Simulacra
-Artifacts: Emblem of Severed Fate x4
- Sands: HP% or Energy Recharge
- Goblet: Hydro DMG Bonus
- Circlet: CRIT Rate or CRIT DMG
- Sub Stats: HP%, CRIT Rate, CRIT DMG, Energy Recharge
-Bennett, 4🌟 Sword:
-Weapon: Mistsplitter Reforged
-Artifacts: Noblesse Oblige x4
- Sands: ATK% or Energy Recharge
- Goblet: Pyro DMG Bonus
- Circlet: CRIT Rate or CRIT DMG
- Sub Stats: Energy Recharge, CRIT Rate, CRIT DMG, ATK%, HP%
-Yun Jin, 4🌟 Polearm:
-Weapon: Engulfing Lightning
-Artifacts: Husk of Opulent Dreams x4
- Sands: DEF% or Energy Recharge
- Goblet: DEF%
- Circlet: CRIT Rate or DEF%
- Sub Stats: Energy Recharge, CRIT Rate, DEF%
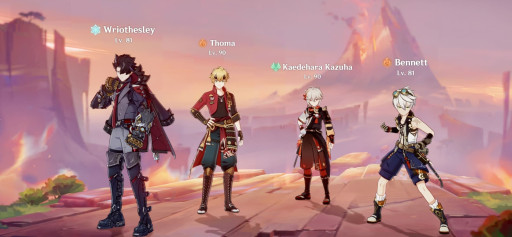
9. Wriothesley + Thoma + Kaedehara Kazuha + Bennett
Melt
Melt teams are mostly composed of Cryo and Pyro Characters. You can also add Dendro characters to produce Burning effect allowing you keep the Pyro aura and consistently produce Melt reactions.
What this team is great for:
- Event challenges that require major damage output.
- Bosses that are weak to Cryo.
- Great for single targets as Wriothesley doesn’t provide AOE damage outside his burst.
How the team works:
- First start with Kazuha to pull all enemies.
- Then use Thoma’s skill to activate his shield.
- Use Wriothesley to do the main source of damage and apply Cryo.
- Switch to Kazuha and use his skill to Swirl Cryo.
- Finally use Bennett to apply Pyro and plant his Fantastic Voyage field for an attack buff and a heal.
Melt team details:
-Wriothesley, 5🌟 Catalyst:
-Weapon: Cashflow Supervision
-Artifacts: Marechaussee Hunter x4
- Sands: ATK%
- Goblet: Cryo DMG Bonus
- Circlet: CRIT DMG
- Sub Stats: Energy Recharge, Elemental Mastery, CRIT Rate, CRIT DMG, ATK%
-Thoma, 4🌟 Polearm:
-Weapon: Kitain Cross Spear
-Artifacts: Flower of Paradise Lost x4
- Sands: Elemental Mastery or Energy Recharge
- Goblet: Elemental Mastery
- Circlet: Elemental Mastery
- Sub Stats: Elemental Mastery, Energy Recharge
-Kaedehara Kazuha, 5🌟 Sword:
-Weapon: Freedom-Sworn
-Artifacts: Viridescent Venerer x4
- Sands: Energy Recharge or Elemental Mastery
- Goblet: Elemental Mastery
- Circlet: Elemental Mastery
- Sub Stats: Energy Recharge, Elemental Mastery, CRIT Rate, CRIT DMG, ATK%
-Bennett, 4🌟 Sword:
-Weapon: Mistsplitter Reforged
-Artifacts: Noblesse Oblige x4
- Sands: ATK% or Energy Recharge
- Goblet: Pyro DMG Bonus
- Circlet: CRIT Rate or CRIT DMG
- Sub Stats: Energy Recharge, CRIT Rate, CRIT DMG, ATK%, HP%
8. Tartaglia + Fischl + Furina + Jean
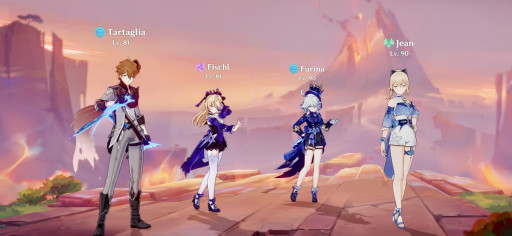
Electro-Charge
Electro-charged team is mostly composed of a Hydro character and an Electro Character. Putting two supports to boost damage while not disturbing the elemental reaction. This team is amazing when facing with Multiple enemies.
What this team is great for:
- Event challenges that require major damage output.
- Bosses that are weak to Hydro damage.
- Great for both single and multiple targets as all characters provide AOE damage.
How the team works:
- First start with Furina and activate her Salon Solitaire.
- Then use Fischl and summon Oz.
- Use Tartaglia as your main DPS.
- Switch to Jean whenever you can or need to use her burst for a heal.
- Finally ensure you keep Furina’s Salon Solitaire active and use her burst when you can.
Electro-Charged team details:
-Tartaglia, 5🌟 Bow:
-Weapon: Polar Star
-Artifacts: Nymph’s Dreams x4
- Sands: ATK%
- Goblet: Hydro DMG Bonus
- Circlet: CRIT Rate or CRIT DMG
- Sub Stats: Elemental Mastery, CRIT Rate, CRIT DMG, ATK%
-Fischl, 4🌟 Bow:
-Weapon: Polar Star
-Artifacts: Golden Troupe x4
- Sands: Elemental Mastery or ATK%
- Goblet: Electro DMG Bonus
- Circlet: CRIT Rate or CRIT DMG
- Sub Stats: CRIT Rate, CRIT DMG, ATK%
-Furina, 5🌟 Sword:
-Weapon: Splendor of Tranquil Waters
-Artifacts: Golden Troupe x4
- Sands: Energy Recharge or HP%
- Goblet: HP% or Hydro DMG Bonus
- Circlet: CRIT Rate or CRIT DMG
- Sub Stats: CRIT Rate, CRIT DMG, HP%, Energy Recharge, Elemental Mastery
-Jean, 5🌟 Sword:
-Weapon: Freedom-Sworn
-Artifacts: Viridescent Venerer x4
- Sands: Energy Recharge or ATK%
- Goblet: Anemo DMG Bonus
- Circlet: Healing Bonus or CRIT Rate or CRIT DMG
- Sub Stats: CRIT Rate, CRIT DMG, Energy Recharge, ATK%
7. Eula + Raiden Shogun + Rosaria + Zhongli
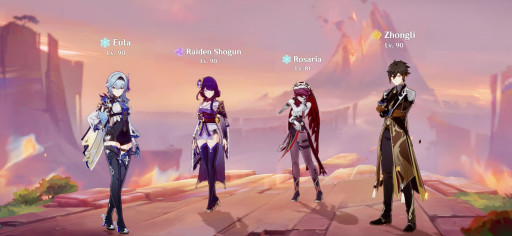
Superconduct
Superconduct reaction reduces the Physical resistance of enemies allowing Physical carries to deal powerful damage. You just need a Physical damage carry and an Electro or Cryo off-field for continuous proc of Superconduct reaction.
What this team is great for:
- Event challenges that require major damage output.
- Bosses that are weak to Cryo damage.
- Great for single targets as this team doesn’t provide AOE damage.
How the team works:
- First start with Zhongli and produce his shield.
- Then use Raiden’s Transcendence: Baleful Omen to activate Eye of Stormy Judgement.
- Use Rosaria and Eula’s skills to apply Cyro as often as possible.
- Switch to Eula for your main DPS or Rosaria as your sub-DPS.
- Finally make sure to keep Eye of Stormy Judgement active.
Superconduct team details:
-Eula, 5🌟 Claymore:
-Weapon: Song of Broken Pines
-Artifacts: Pale Flame x4
- Sands: ATK%
- Goblet: Physical DMG Bonus
- Circlet: CRIT Rate or CRIT DMG
- Sub Stats: Energy Recharge, CRIT Rate, CRIT DMG, ATK%
-Raiden Shogun, 5🌟 Polearm:
-Weapon: Engulfing Lightning
-Artifacts: Emblem of Severed Fate x4
- Sands: Energy Recharge or ATK%
- Goblet: ATK% or Electro DMG Bonus
- Circlet: CRIT Rate or CRIT DMG
- Sub Stats: Energy Recharge, Elemental Mastery, CRIT Rate, CRIT DMG, ATK%
-Rosaria, 4🌟 Polearm:
-Weapon: Staff of Homa
-Artifacts: Blizzard Strayer x4
- Sands: ATK% or Energy Recharge
- Goblet: Cryo DMG Bonus
- Circlet: CRIT Rate or CRIT DMG
- Sub Stats: Energy Recharge, CRIT Rate, Crit DMG, ATK%
-Zhongli, 5🌟 Polearm:
-Weapon: Black Tassel
-Artifacts: Tenacity of the Millelith x4
- Sands: HP%
- Goblet: HP%
- Circlet: HP%
- Sub Stats: HP%, HP, Energy Recharge
6. Sangonomiya Kokomi + Yae Miko + Yoimiya + Zhongli
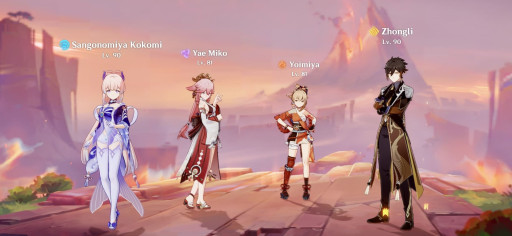
Fire-Dance
This team focuses on Yoimiya’s skill, Niwabi Fire-Dance, to deal loads of damage by reacting to the other elements that the Yae Miko and Kokomi can apply. Kokomi’s heal and Zhongli’s shield is a great source of sustainability.
What this team is great for:
- Event challenges that require major damage output.
- Bosses that are weak to Pyro reactions.
- Great for both single and multiple targets as all characters provide AOE damage.
How the team works:
- First start with Zhongli and produce his shield.
- Then use Yae Miko and place Yakan Evocation: Sesshou Sakura’s.
- Use Kokomi’s Kurage’s Oath for Hydro application and sustainability.
- Switch to Yoimiya and activate her Niwabi Fire-Dance.
- Finally fire Yoimiya’s basic attack to cause various elemental reactions.
Fire-Dance team details:
-Sangonomiya Kokomi, 5🌟 Catalyst:
-Weapon: Everlasting Moonglow
-Artifacts: Ocean-Hued Clam x4
- Sands: HP% or Energy Recharge
- Goblet: Hydro DMG Bonus
- Circlet: Healing Bonus or HP%
- Sub Stats: Energy Recharge, Elemental Mastery, HP%
-Yae Miko, 5🌟 Catalyst:
-Weapon: Kagura’s Verity
-Artifacts: Golden Troupe x4
- Sands: Elemental Mastery or ATK%
- Goblet: Electro DMG Bonus
- Circlet: CRIT Rate or CRIT DMG
- Sub Stats: Energy Recharge, Elemental Mastery, CRIT Rate, CRIT DMG, ATK%
-Yoimiya, 5🌟 Bow:
-Weapon: Thundering Pulse
-Artifacts: Shimenawa’s Reminiscence x4
- Sands: ATK%
- Goblet: Pyro DMG Bonus
- Circlet: CRIT Rate or Crit DMG
- Sub Stats: Energy Recharge, Elemental Mastery, Crit DMG, CRIT Rate, ATK%
-Zhongli, 5🌟 Polearm:
-Weapon: Black Tassel
-Artifacts: Tenacity of the Millelith x4
- Sands: HP%
- Goblet: HP%
- Circlet: HP%
- Sub Stats: HP%, HP, Energy Recharge
5. Tighnari + Yae Miko + Yaoyao + Zhongli
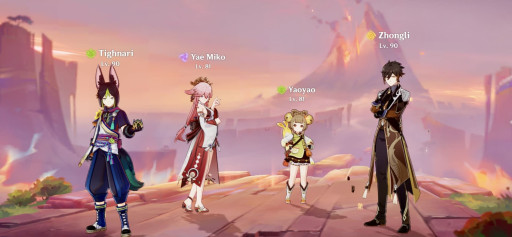
Tiggy-Spread
Inflicting Electro and Dendro to enemies will put enemies in a Quickened state. Attacking enemies with Electro or Dendro in Quickened state will produce Aggravate and Spread that increases the damage. In this team, you only need Dendro and Electro characters damage dealers and supports.
What this team is great for:
- Event challenges that require major damage output and swift completion.
- Bosses that are weak to Dendro and Electro.
- Great for both single and multiple targets as all characters provide AOE damage.
How the team works:
- First start with Zhongli and produce his shield.
- Then use Yae Miko and place Yakan Evocation: Sesshou Sakura’s.
- Use Yaoyao’s Yuegui for heals and Dendro application.
- Switch to Tighnari to dish out the massive DPS.
- Finally, ensure to keep Yakan Evocation: Sesshou Sakura’s on the field.
Details:
-Tighnari, 5🌟 Bow:
-Weapon: Hunter’s Path
-Artifacts: Gilded Dreams x4
- Sands: ATK% or Elemental Mastery
- Goblet: Dendro DMG Bonus
- Circlet: CRIT Rate or CRIT DMG
- Sub Stats: Elemental Mastery, CRIT Rate, CRIT DMG, ATK%
-Yae Miko, 5🌟 Catalyst:
-Weapon: Kagura’s Verity
-Artifacts: Golden Troupe x4
- Sands: Elemental Mastery or ATK%
- Goblet: Electro DMG Bonus
- Circlet: CRIT Rate or CRIT DMG
- Sub Stats: Energy Recharge, Elemental Mastery, CRIT Rate, CRIT DMG, ATK%
-Yaoyao, 4🌟 Polearm:
-Weapon: Favonius Lance
-Artifacts: Deepwood Memories x4
- Sands: HP% or Energy Recharge
- Goblet: HP%
- Circlet: CRIT Rate or Healing Bonus
- Sub Stats: Energy Recharge, CRIT Rate, Crit DMG, Elemental Mastery, HP%
-Zhongli, 5🌟 Polearm:
-Weapon: Black Tassel
-Artifacts: Tenacity of the Millelith x4
- Sands: HP%
- Goblet: HP%
- Circlet: HP%
- Sub Stats: HP%, HP, Energy Recharge
4. Kamisato Ayato + Thoma + Nahida + Baizhu
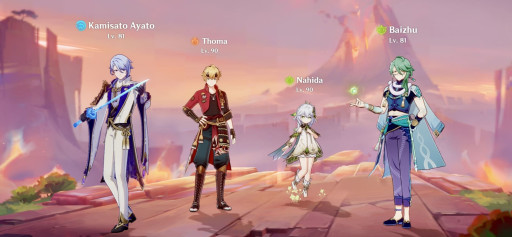
Ayato-Burgeon
Burgeon reaction deals powerful damage at a huge AoE. It also damages your character so it is pretty risky to use and less consistent. You need Hydro, Dendro and Pyro for this team. The fourth member can be an Elemental Mastery support for more damage.
What this team is great for:
- Event challenges that require major damage output.
- Bosses that aren’t Hydro bodies, since Kamisato Ayato is going to be your main DPS.
- Great for both single targets as Kamisato Ayato’s skill and multiple targets as Burgeon provides AOE damage.
How the team works:
- First start with Nahida and use her All Schemes to Know.
- Then use Kamisato Ayato’s Kamisato Art: Kyouka to apply hydro and create Dendro Cores.
- Use Thoma’s skill or burst to ignite the Dendro Cores.
- Switch to Baizhu if you need to heal and to apply more Dendro.
- Finally make sure to utilize Nahida’s burst for damage buffs.
Ayato Burgeon team details:
-Kamisato Ayato, 5🌟 Sword:
-Weapon: Haran Geppaku Futsu
-Artifacts: Echoes of an Offering x4
- Sands: ATK%
- Goblet: Hydro DMG Bonus
- Circlet: CRIT Rate or CRIT DMG
- Sub Stats: Energy Recharge, CRIT Rate, CRIT DMG, ATK%, HP%
-Thoma, 4🌟 Polearm:
-Weapon: Kitain Cross Spear
-Artifacts: Flower of Paradise Lost x4
- Sands: Elemental Mastery or Energy Recharge
- Goblet: Elemental Mastery
- Circlet: Elemental Mastery
- Sub Stats: Elemental Mastery, Energy Recharge
-Nahida, 5🌟 Catalyst:
-Weapon: A Thousand Floating Dreams
-Artifacts: Deepwood Memories x4
- Sands: Elemental Mastery
- Goblet: Elemental Mastery or Dendro DMG Bonus
- Circlet: CRIT Rate or Crit DMG or Elemental Mastery
- Sub Stats: Energy Recharge, CRIT Rate, Crit DMG, Elemental Mastery
-Baizhu, 5🌟 Catalyst:
-Weapon: Jadefall’s Splendor
-Artifacts: Deepwood Memories x4
- Sands: HP% or Energy Recharge
- Goblet: HP%
- Circlet: HP%
- Sub Stats: HP%, HP, Energy Recharge
3. Arataki Itto + Chiori + Gorou + Zhongli
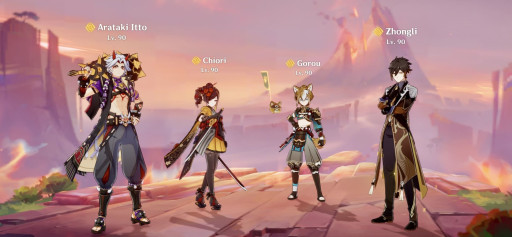
Mono-Geo
Gorou has an amazing buff for Mono-Geo teams that will increase the damage of Itto and Chiori greatly. Zhongli will be there for sustenance but can be replaced with a healer.
What this team is great for:
- Event challenges that require major damage output.
- Bosses that do not require elemental reactions, since Geo only reacts as Crystalize.
- Great for single targets as Itto doesn’t provide AOE damage.
How the team works:
- First start with Zhongli and produce his shield.
- Then use Gorou and plant his War Banner.
- Use Chiori’s Tamoto and then use her skill again (if Itto is positioned after her).
- Switch to Itto and chuck Ushi out to distract the enemies.
- Finally use Itto’s burst to deal massive Geo damage.
Mono-Geo team details:
-Arataki Itto, 5🌟 Claymore:
-Weapon: Redhorn Stonethresher
-Artifacts: Husk of Opulent Dreams x4
- Sands: DEF%
- Goblet: Geo DMG Bonus
- Circlet: CRIT Rate or CRIT DMG
- Sub Stats: Energy Recharge, CRIT Rate, CRIT DMG, DEF%
-Chiori, 5🌟 Sword:
-Weapon: Uraku Misugiri
-Artifacts: Golden Troupe x4
- Sands: DEF% or ATK%
- Goblet: Geo DMG Bonus
- Circlet: CRIT Rate or CRIT DMG
- Sub Stats: DEF%, CRIT Rate, CRIT DMG, ATK%
-Gorou, 4🌟 Bow:
-Weapon: Elegy of the End
-Artifacts: Husk of Opulent Dreams x2 & Emblem of Severed Fate x2
- Sands: DEF% or Energy Recharge
- Goblet: DEF%
- Circlet: CRIT Rate or DEF%
- Sub Stats: Energy Recharge, CRIT Rate, DEF%
-Zhongli, 5🌟 Polearm:
-Weapon: Black Tassel
-Artifacts: Tenacity of the Millelith x4
- Sands: HP%
- Goblet: HP%
- Circlet: HP%
- Sub Stats: HP%, HP, Energy Recharge
2. Kinich + Emilie + Bennett + Xiangling
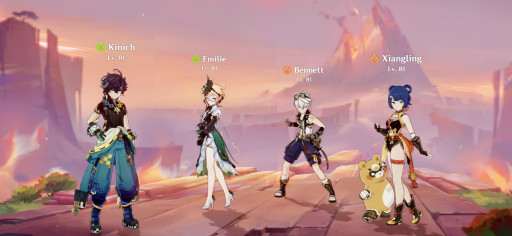
Burning Fragrance
Emilie is a character that takes advantage of the Burning reactions to deal powerful damage. Paired with Pyro characters, you can create an amazing Burning Comp for the team. With Kinich as a Main DPS, you can deal further increased damage that is competitive against top teams.
What this team is great for:
- Event challenges that require major damage output and quick completion.
- Bosses that are weak to Pyro and Dendro, since Kinich is your main DPS and the burning reaction will be your sub-DPS.
- Great for both single targets as well as multiple, for Kinich can pick off enemies one-by-one while Emilie’s Lumidouce Case ticks at all.
How the team works:
- First start with Emilie and produce her Lumidouce Case.
- Then use Xiangling to drop Gouba.
- Use Kinich to start dealing massive damage with his skill.
- Switch to Bennett to afflict pyro as needed.
- Always make sure to keep a Lumidouce Case on the field.
Burning Fragrance team details:
-Kinich, 5🌟 Claymore:
-Weapon: Fang of the Mountain King
-Artifacts: Unfinished Reverie x4
- Sands: ATK%
- Goblet: Dendro DMG Bonus
- Circlet: CRIT Rate or CRIT DMG
- Sub Stats: Energy Recharge, Elemental Mastery, CRIT Rate, CRIT DMG, ATK%
-Emilie, 5🌟 Polearm:
-Weapon: Lumidouce Elegy
-Artifacts: Unfinished Reverie x4
- Sands: ATK%
- Goblet: Dendro DMG Bonus
- Circlet: CRIT Rate or CRIT DMG
- Sub Stats: Energy Recharge, CRIT Rate, CRIT DMG, ATK%
-Bennett, 4🌟 Sword:
-Weapon: Mistsplitter Reforged
-Artifacts: Noblesse Oblige x4
- Sands: ATK% or Energy Recharge
- Goblet: Pyro DMG Bonus
- Circlet: CRIT Rate or CRIT DMG
- Sub Stats: Energy Recharge, CRIT Rate, CRIT DMG, ATK%, HP%
-Xiangling, 5🌟 Polearm:
-Weapon: Engulfing Lightning
-Artifacts: Emblem of Severed Fate x4
- Sands: Energy Recharge
- Goblet: Pyro DMG Bonus
- Circlet: Crit Rate or Crit DMG
- Sub Stats: Crit Rate, Crit DMG, Energy Recharge, ATK%
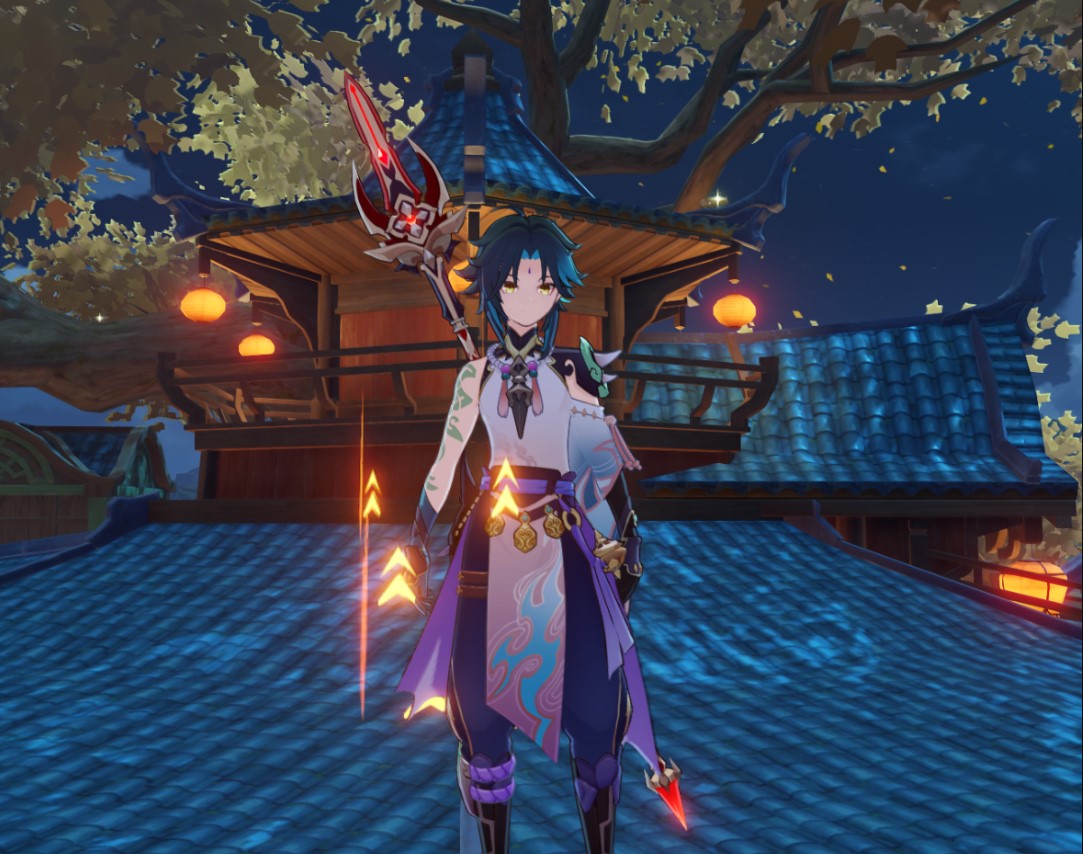
1. Xiao + Kaedehara Kazuha + Bennett + Zhongli
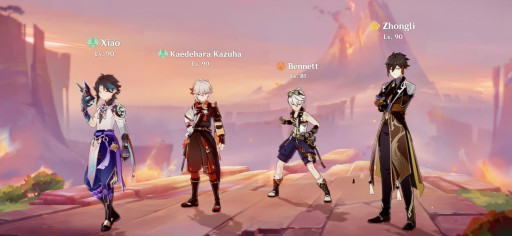
Pogo Xiao
This team focuses on buffing Xiao while also keeping him alive. It is best for stationary enemies, though Kazuha can bring in any stragglers. Bennett’s burst is to maintain sustainability, so be sure to have one character be a battery with a high energy recharge stat.
What this team is great for:
- Event challenges that require major damage output and quick completion.
- Bosses that keep stationary, since you want to keep inside Bennetts Fantastic Voyage field.
- Any single target enemies such as Mitachurls, Hillichurl Rogues and Ruin Guards.
How the team works:
- First start with Bennett to afflict pyro.
- Then use Kazuha to pull/Swirl enemies.
- Use Zhongli to provide a shield.
- Switch back to Bennett and use his burst.
- Lastly, pull out Xiao, use his burst and plunge attack.
Pogo Xiao team details:
-Xiao, 5🌟 Polearm:
-Weapon: Primordial Jade Winged-Spear
-Artifacts: Vermillion Hereafter x4
- Sands: ATK% or Energy Recharge
- Goblet: Anemo DMG Bonus
- Circlet: CRIT Rate or CRIT DMG
- Sub Stats: Energy Recharge, CRIT Rate, CRIT DMG, ATK%
-Kaedehara Kazuha, 5🌟 Sword:
-Weapon: Freedom-Sworn
-Artifacts: Viridescent Venerer x4
- Sands: Energy Recharge or Elemental Mastery
- Goblet: Elemental Mastery
- Circlet: Elemental Mastery
- Sub Stats: Energy Recharge, Elemental Mastery, CRIT Rate, CRIT DMG, ATK%
-Bennett, 4🌟 Sword:
-Weapon: Mistsplitter Reforged
-Artifacts: Noblesse Oblige x4
- Sands: ATK% or Energy Recharge
- Goblet: Pyro DMG Bonus
- Circlet: CRIT Rate or CRIT DMG
- Sub Stats: Energy Recharge, CRIT Rate, CRIT DMG, ATK%, HP%
-Zhongli, 5🌟 Polearm:
-Weapon: Black Tassel
-Artifacts: Tenacity of the Millelith x4
- Sands: HP%
- Goblet: HP%
- Circlet: HP%
- Sub Stats: HP%, HP, Energy Recharge
Hope this guide helps you on your journey through Natlan in the new version 5 patches. Be sure to check out our other guides for more character specific builds, if you’re not sure how to get the most out of your favorite characters, if they aren’t in this guide. Safe travels and don’t forget your emergency food!
