Hey, y’all! It’s me back again with another tips and tricks for you guys. I finally got my hands on a PS5 and got to play Final Fantasy XVI, the latest entry in the long-running and critically acclaimed series. It’s darker, grittier, and more grounded than the previous entries, making it so fun and unique!
Now, this game is a PlayStation 5 exclusive, and it’s generally considered an easy Platinum, with the only tough trophies being the “Masterclass” and the “Fantasy, Finally!” Trophies. To complete the former of the two, you will need a lot of Ability Points, or AP for short, to complete Clive’s skill tree.
In this article, I’ll be helping you out by giving the Best Ways to Farm those AP Points to get that sweet, sweet Platinum Trophy as earliest as possible! Let’s begin, shall we?
10. Hunt the Bluebirds near Northreach Obelisk (Early Game)

The locations of the Bluebirds near the Northreach Obelisk.
Alright, so first things first. You start the game and choose any of the two modes available for your first playthrough. They’re called “Story-Focused” and “Action-Focused”, respectively. You’ll get the same amount of AP from both modes, so choose any that fits your playstyle.
Once you reach Northreach, go towards the Royal Meadows area, and from there, you’ll see the Bluebirds roaming around freely; these are basically the greenish-blue colored Chocobos roaming in the wild. They won’t budge you until you strike them.
You can farm for AP right here in this area by killing them, AND you get 40 AP per kill for that! Pretty solid for early game.
How it works
- Start your first playthrough of the game and continue until you reach the Northreach Obelisk.
- Go to the “Royal meadows” area and find the Bluebirds animal roaming in the area.
- Kill them to get 40 AP per kill and repeat if you want to stack up and unlock early abilities of Clive.
9. Hunt the Bluebirds near Sorrowise Region (Early Game)
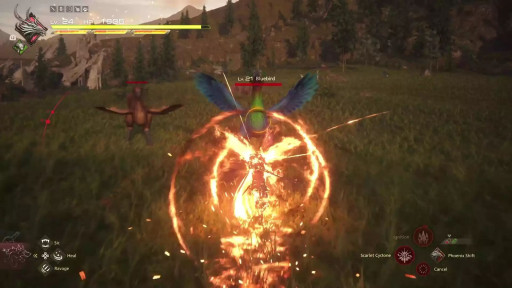
Some of the Bluebirds that you’ll find in the overall game.
Up next, you go to the Sorrowise Region of the Imperial Province of Rosaria (formerly known as the Grand Duchy of Rosaria). You’ll reach there eventually once you continue through the story.
Unlock the Martha’s Rest Obelisk and go down the elevator leading to Glaidesmond Abbey; you’ll see a lot of Chocobos there and Bluebirds as well. Be sure to kill them for farming that AP.
It’s the same as above, where you get 40 AP per kill.
How it works:
- Continue through the story until you unlock the Imperial Province of Rosaria region AND Martha’s Rest Obelisk.
- Go down the elevator leading to Glaidesmond Abbey, and you’ll enter Sorrowise region.
- Find the Bluebirds and kill them for AP farming. Rinse and repeat.
8. Hunt for Bluebirds near Hawk’s Cry Cliff region (Early Game)

The locations from where you’d find Bluebirds near Hawk’s Cry Cliff.
Now, you progress through the main story and ensure you complete all the side quests before you hit the point of no return in-game; that’s how you’ll unlock the Hawk’s Cry Cliff region in Rosaria.
If you’ve completed all the side-quests along with the main scenario, you should have unlocked the Chocobo by now. That way, traversal would be easier compared to simple walking/running.
Hunt for the Bluebirds in this region for 40 AP per kill, and you should be set for Early Game AP Farming. Just reset the checkpoint, kill them, and repeat. I would, however, recommend going a bit further after you’ve completed the three Eikon Slots for now.
How it works:
- Continue playing through the main story until you complete the “Getting to Work” Main Scenario Quest, after which you should go to Rodrigue for “Do No Harm” Side Quest.
- Hawk’s Cry Obelisk will automatically be unlocked and complete the sidequest along with slaying the Bluebirds within the area.
- Repeat the process until you gain enough AP to buy all abilities unlocked up until now.
7. Unlock the “Cloak and Dagger” Main Scenario Quest, which ends with Free Cities of Kanver
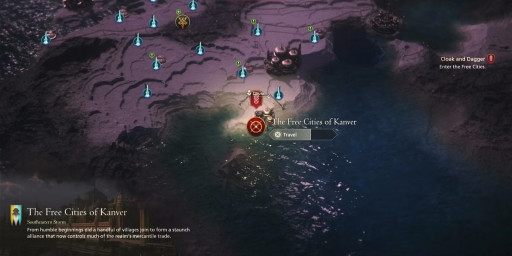
The Autonomous Region of the Free Cities of Kanver
Once the “Cloak and Dagger” Main Quest has been unlocked, you’ve finally made it onto the Mid-Game Portion, and you finally get to make that trip to the Free Cities of Kanver.
This is a good spot for AP Farming in that you only need to focus on the First Three groups of enemies that come your way ,restart the checkpoint, and repeat.
You can repeat this via the Arete Stone as well, but I wouldn’t recommend that at all since you gain less AP via the Arete Stone method, so go for the Main Scenario all the way.
How it works:
- Continue playing through the Main Scenario until you unlock the Free Cities of Kanver in the “Cloak and Dagger” quest.
- Fight the first three groups of enemies and reset it.
- Rinse and repeat for farming AP.
6. Equip “The Wages of Warcraft” Accessory (Mid-Game)
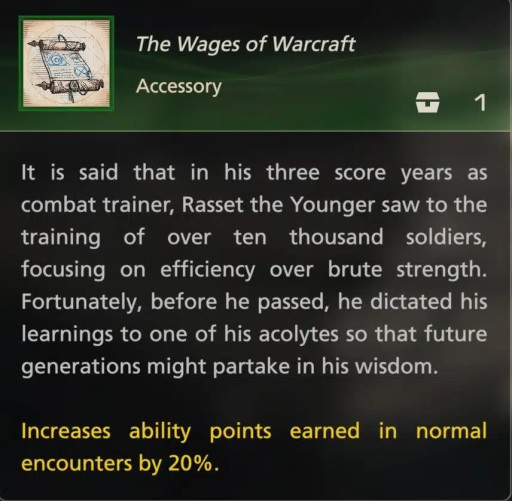
Item Description for this Godsent item.
This is an important step when you start Mid-Game because this will significantly help you in your AP Farming for your first playthrough. After all, your normal AP collection will increase by 20% thanks to this accessory.
To get this, you need to have completed the “Cid the Outlaw” Main Scenario Quest and have unlocked the New Hideaway after a Five-Year Timeskip. Go to Charon and buy “The Wages of Warcraft” accessory. Equip it, and your job will become much easier.
How it works
- Continue playing through the main story until you complete the “Cid the Outlaw” main quest and reach the New Hideaway.
- Go to Charon within the New Hideaway and purchase the “The Wages of Warcraft” Accessory from her.
- Equip it and start farming.
5. Complete Hunts side-by-side (Mid-Game)
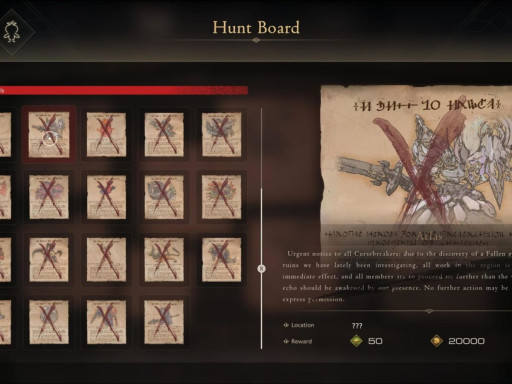
An example of the Hunt Board.
This one’s fairly simple enough. You unlock Hunts when you reach the New Hideaway as well and there is a Moogle there that lists all of the Monsters that you have to hunt for EXP as well as AP Points.
The higher the rank, the more difficult they will be to face off, and once you reach the endgame, you’ll have almost completed the Hunt Board as well! Not to mention, plenty of AP Points there, too!
How it works:
- Go to the Hunt Board at the New Hideaway and locate the presence of the Monster you need to hunt within the map.
- Slay the Monster, and collect AP until endgame.
4. Hunt Hyenas at Ravenwit Falls Obelisk at Waloed (Late Game)
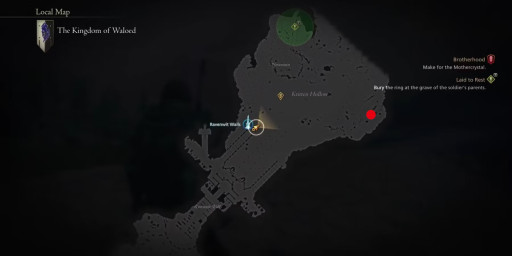
The location for the Hyenas at Waloed.
If you’ve entered Waloed, you know you’re almost in the final phases of the game. This is one of the tougher areas of the game meant for high-level players, and the enemies here are tougher than the ones you’d find on the Continent of Storm.
The same can be said about these Hyenas from where you can fight them near the Ravenwit Falls Obelisk and get 80 AP per kill. If you have the “The Wages of Warcraft” Accessory equipped with you, your AP gain can be increased by 20%, so a 96 AP per kill doesn’t sound too bad.
How it works
- Unlock the Waloed region by continuing through the main story.
- Unlock the Ravenwit Falls obelisk.
- Slay the Hyenas and repeat for farming.
3. Play New Game+ at Final Fantasy Mode
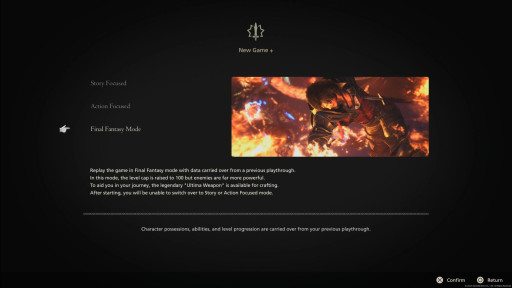
That’s what you see when you start New Game +.
This is where the real work starts. Now that you’ve completed your first playthrough of the game, I highly recommend starting New Game + on “Final Fantasy Mode,” where there will be tougher enemies and new upgrades as well.
You must have completed your previous playthrough to unlock this mode AND make a separate save file for it. Do not overwrite it on your previous save, or you will lose access to the New Game + mode.
How it works:
- Complete the previous playthrough of the game to unlock this mode.
- Make sure to save on a separate save file and do not overwrite previous save files for access.
2. Purchase “The Wages of Warcraft” twice for Upgrade
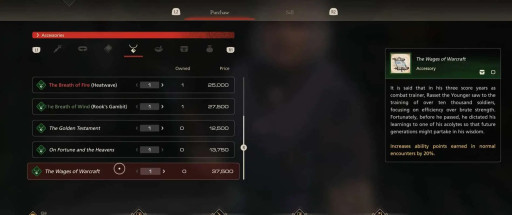
You gotta buy two of these to upgrade and keep the one you already have with you to get that 60% AP Boost.
Now that you’ve started your playthrough, play through the story again until you access the New Hideaway and buy 2 of “The Wages of Warcraft” accessories.
Once that’s done, go to Blackthrone, the blacksmith of the Hideaway, and give him the 2 “The Wages of Warcraft” accessories to upgrade to “The Wages of Warcraft II” for getting 40% AP.
Once that’s done, equip “The Wages of Warcraft II” AND “The Wages of Warcraft” in your slots so that you can get 40% AP from “Wages of Warcraft II” as well as 20% AP from “Wages of Warcraft,” making it a total of 60%. Huge boost, yes. BUT, it's only possible in New Game +.
How it works:
- Play through New Game + in Final Fantasy mode until you reach the New Hideaway.
- Buy “The Wages of Warcraft” twice from Charon and upgrade them via Blackthorne.
- Equip “The Wages of Warcraft II” AND “The Wages of Warcraft,” and you’re good to go.
1. Hunt Hyenas at Ravenwit Falls Obelisk at Waloed in New Game Plus
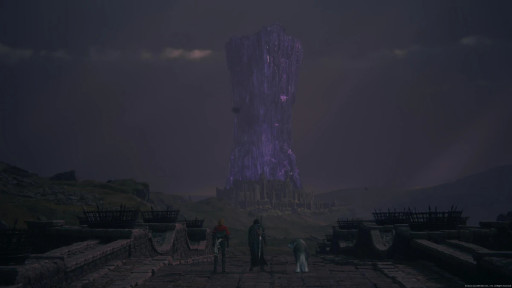
Same spot as mentioned above. Anyways, here’s Drake’s Spine.
This one is the final step. Play through New Game + on Final Fantasy Mode and reach for the Waloed region, and go for the same Hyenas located near the Ravenwit Falls Obelisk.
Only this time, the difference is that you will get 160 AP per kill, and if you combine that with the 60% AP Gain you will get with the accessories equipped, you will score a whopping 256 AP per kill. This is THE PERFECT spot for AP farming, and you’ll earn the “Masterclass” trophy in no time.
How it works:
- Play through New Game + on Final Fantasy Mode until you reach Waloed.
- Have the afore-mentioned accessories equipped and search for the Hyenas near the Ravenwit Falls obelisk.
- Slay, reset, and repeat.
That’s about it with the best AP farming methods! I hope it helped. Now, I gotta go do these steps myself as well, so catch you later!


